This post may contain affiliate links. Please read our disclosure policy.
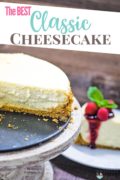
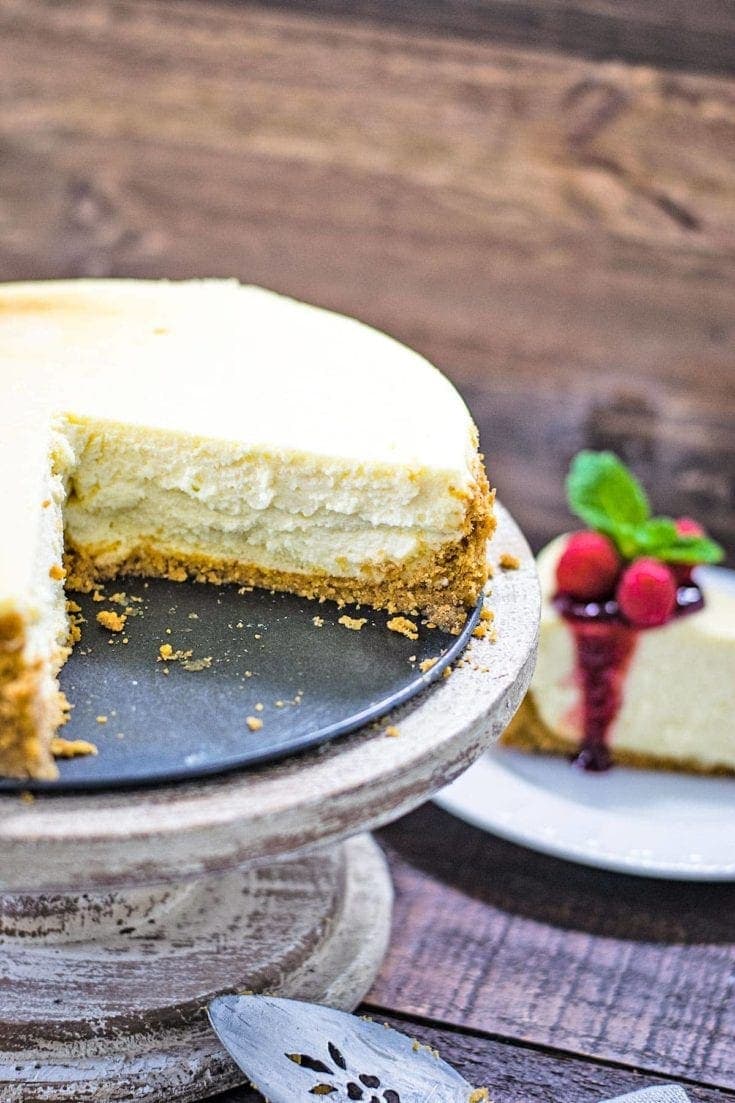
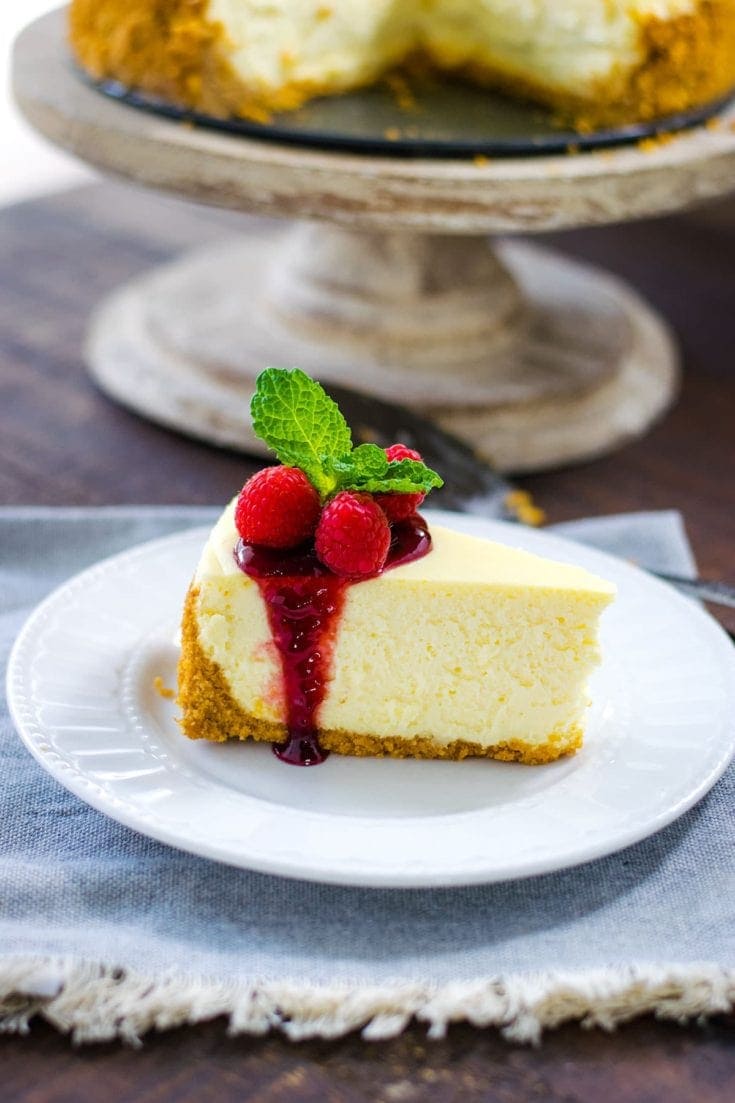
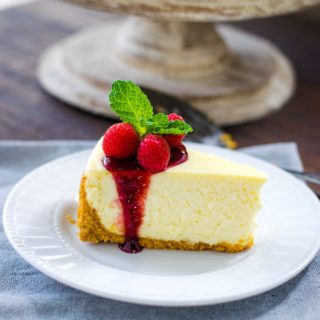
There’s cheesecake… and then there’s this delicious Homemade Cheesecake. I’ve made plenty over the years, tweaking and perfecting every step so you don’t have to deal with cracks, sinking centers, or a texture that’s just meh. _This recipe guarantees a smooth, creamy, bakery-quality cheesecake every single tim_e. If you’ve ever been disappointed by a so-so cheesecake, this Homemade Classic Cheesecake will change that for good!
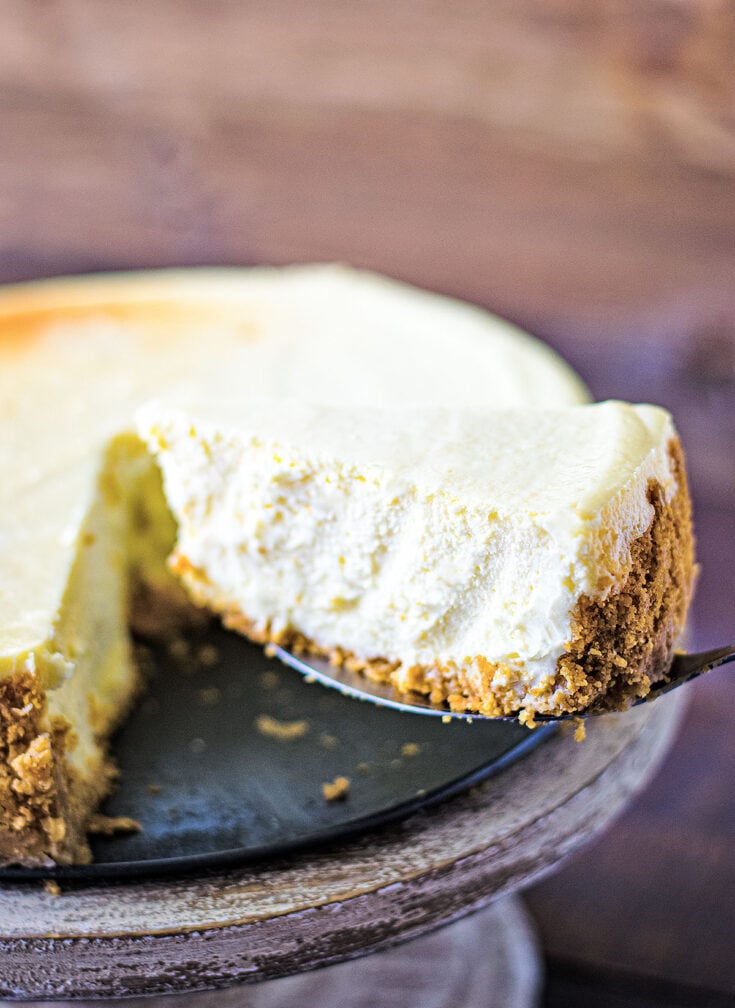
I’ve made enough cheesecakes over the years to know exactly what not to do. Cracks, sinking centers, dry texture—I’ve seen it all. But after plenty of trial and error, I’ve worked out every single issue so that you don’t have to. This recipe takes out all the guesswork, giving you a foolproof method for a creamy, smooth, and absolutely stunning cheesecake every single time. No more crossing your fingers and hoping for the best—just follow these steps, and you’ll get perfection.
The best part? Once you’ve got the classic cheesecake down, you can make it your own. Swap the crust, mix in flavors, or pile on the toppings—this base is strong enough to handle it all. So whether you’re making it for a special occasion or just because (because who really needs an excuse for cheesecake?), you can trust that this recipe will never let you down!
And when you need a no-fail cheesecake recipe, I want you to have one to pull out of that trusty recipe box!
How to Make Classic Cheesecake
How to Make a Graham Cracker Crust
To make this classic cheesecake recipe, you start with a homemade graham cracker crust.
- Melt Butter: Place butter in the microwave and melt for 30 seconds or until completely melted.
- Combine Graham Crackers, Sugar, and Butter: Place graham crackers into a food processor and pulse under crumbs. Start to form and add in sugar. Close the lid and drizzle butter in through through the top opening until combined and forms a wet sand-like consistency.
- Prepare Springform Pan: In order to remove more easily from the pan, you can cut a piece of parchment paper or aluminum foil and place it on the bottom of the pan. This is not necessary if serving on the bottom, or you can pretty easily remove it without this step. However, by doing so, it makes it much easier to remove. (optional)
- Press into a Springform Pan: I use the bottom of a measuring cup to firmly press it down into the bottom of the pan.
- Bake the crust for 8 to 10 minutes and set it aside to cool.
How to Make a Water Bath
A water bath sounds complicated, but it really isn’t. All you are doing is placing your springform pan into another pan, filling it with hot water, and baking.
A humid environment is perfect for an amazing cheesecake. The steam from the hot water allows it to cook evenly and slowly. This will reduce the risk of cracks on the surface. It also prevents the cake from deflating as it cools down.
Make sure to wrap your springform pan with heavy-duty aluminum foil, or even use an oven bag as an added level of protection from water leaking in. I like this springform pan to prevent leaks, but I still use this method to be extra careful. No one likes a soggy crust!
Preparing a water bath and taking a few extra steps is well worth the effort. Remember it’s a labor of love and a very important step!
Slowly Cooling & Chilling the Cheesecake
Making the perfect classic cheesecake recipe is a slow and gentle process that awards you the most amazing results! Be patient and you get the most creamy and dreamy classic cheesecake!
Once it is finished cooking, you need to turn off the oven, crack open the door, and let it cool in the oven for 1 hour. This is another way to prevent cracks. Drastic and sudden changes in temperature are sure ways for cracking and sinking to happen. So, if you go from a really hot oven to the countertop or fridge, the cake cools down too fast and can be disastrous.
After the cheesecake cools in the oven for 1 hour, remove it from the water bath. Place on the counter to cool completely. After it has cooled, cover the springform pan with aluminum foil or plastic wrap and chill it in the refrigerator for 4 hours overnight.
The wait will be worth every luscious bite! I promise!
Classic Cheesecake Recipe Variations
One of the best things about a classic cheesecake is that it’s the perfect canvas for all kinds of fun variations! Whether you’re switching up the crust, adding mix-ins, or topping it with something indulgent, there are so many ways to make this recipe your own.
Want to Save this Recipe?
By submitting this form, you consent to receive emails from Soulfully Made.
Crust Swaps
- Oreo Crust – Swap out the graham crackers for crushed Oreos (filling and all!) for a rich, chocolatey base.
- Biscoff Crust – Use crushed Biscoff cookies for a warm, spiced twist that pairs perfectly with the creamy filling.
- Nilla Wafer Crust – A little sweeter and more delicate than graham crackers, but still delicious!
Flavor Twists
- Lemon Cheesecake – Amp up the lemon juice to 3 teaspoons and add 1 teaspoon of zest for a brighter, citrusy flavor.
- Chocolate Cheesecake – Mix in ½ cup of melted dark or milk chocolate into the batter for a decadent chocolate version.
Topping Ideas
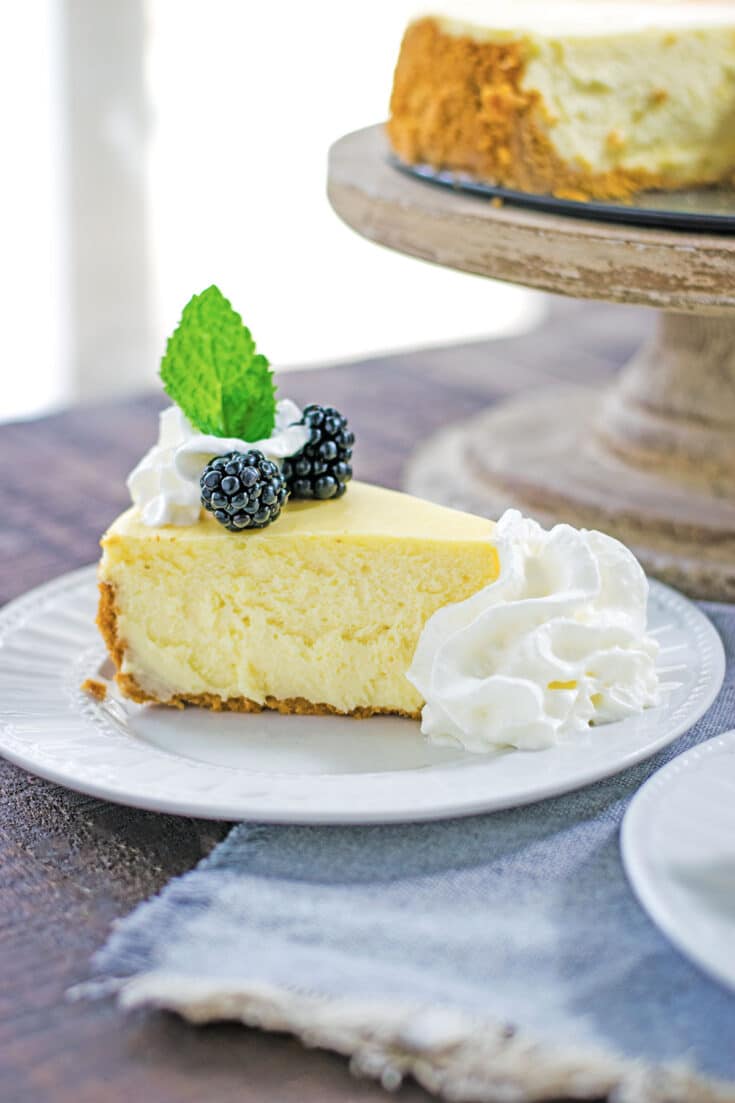
- Berry Toppings – Fresh berries, fruit compote, or even a homemade raspberry sauce.
- Caramel Pecan – Drizzle caramel sauce and sprinkle chopped pecans over the top.
- Chocolate Ganache – Melted chocolate + heavy cream = a rich and glossy topping.
- Peanut Butter Swirl – Swirl in warmed peanut butter before baking for a nutty twist
Original Cheesecake Recipe Tips
- Make sure all ingredients are at room temperature. Take out the cream cheese, sour cream, and eggs ahead of time.
- Do not over-mix the cheesecake batter! When mixing keep it low and slow and mix until just until combined. This keeps too much air out.
- Before baking, gently tap the pan on the counter a few times. Any air bubbles will come to the top. You can pop them with a toothpick and then smooth out the top.
- Always bake in a water bath. Start boiling a large pot of water before making the filling.
- Wrap your springform pan in double heavy-duty aluminum foil to prevent the water bath from leaking into the pan. You can also use an oven bag wrapped up around the pan to be extra sure the water does not sneak in. This ensures a crunchy crust.
- Slowly cool the cheesecake. Start with a 1 hour cool down in the oven after baking.
Then, cool completely at room temperature before chilling it in the refrigerator.
How to Properly Store This Classic Cheesecake
To keep your Classic Cheesecake fresh and just as delicious as the day you made it, proper storage is key!
- Refrigerate: Once fully cooled, cover the cheesecake tightly with plastic wrap or foil and store it in the fridge for up to 5 days. For best results, keep it in the springform pan until ready to serve to help maintain its shape.
- Freezing: Want to make it ahead? Cheesecake freezes beautifully! Wrap the whole cheesecake (or individual slices) in plastic wrap, then again in foil. Store in the freezer for up to 2 months. When ready to enjoy, thaw in the fridge overnight.
- Serving Tip: For the best texture, let refrigerated cheesecake sit at room temperature for about 20–30 minutes before serving. This brings back that ultra-creamy consistency!
Delicious Desserts to Enjoy
- Apple Butter Cheesecake Tart
- Easy Banana Pudding Recipe
- Coconut Cream Pie
- Oreo Brownie Poke Cake
- Lemon Pudding Poke Cake
Hungry for more easy, home-cooked, delicious recipes?
Sign up for my free recipe club to get family-friendly recipes in your inbox each week! Find me sharing daily meal-time inspiration on Pinterest, Facebook, and Instagram.
Classic Cheesecake Recipe
Ingredients
Graham Cracker Crust
- 2 cups graham cracker crumbs
- ¼ cup granulated sugar
- 7 Tablespoons butter, melted
- pinch kosher salt
Cheesecake
- 4 – 8 ounce blocks block cream cheese, room temperature
- 1 cup granulated sugar
- 1 teaspoon vanilla
- 1 cup sour cream, room temperature
- 2 teaspoons fresh squeezed lemon juice
- 3 large eggs, room temperature
Instructions
Making the Graham Cracker Crust
- Adjust oven rack to the lower middle of oven, so that roasting pan will fit. Preheat oven to 350 degrees.
- Using a food processor, pulse the graham crackers into crumbs. Pour in sugar and melted butter and pulse together. (You can also crush crackers in a ziplock bag with a rolling pin or something heavy. Then pour medium bowl and stir in sugar and butter until combined.) Mixture will be sandy in texture. Pour crumbs into the bottom of a 9 or 10 inch springform pan.
- If desired place parchment circle or line bottom of springform pan with foil. This makes it easier to remove from pan after baking.
- Press the crumbs into the bottom and up the sides of the springform pan. I use the bottom of a measuring cup to pack the crust in firmly.
- Pre-bake crust for 8 to 10 minutes. Remove from oven to a cooling rack to slightly cool while preparing filling.
- Reduce oven heat to 325 degrees.
- Preparing the Cheesecake Filling
- Using a handheld or stand mixer fitted with paddle attachment, beat the cream cheese and granulated sugar together on medium-high speed until smooth and creamy, about 2 minutes. Add in the sour cream, vanilla extract, and lemon juice and beat until combined. On medium low speed, add in eggs on at a time. Stop and mix in each egg until incorporated into the batter. Avoid over mixing as this may cause cracking.
Preparing the Water Bath & Baking Cheesecake
- Boil a pot or kettle of water. You need enough water to have 1 inch of water in your roasting pan. As water is heating, wrap the springform pan with heavy duty aluminum foil. Pour the cheesecake batter on top of the graham cracker crust. Use a spatula to smooth the top into an even layer.
- Place springform wrapped pan into roasting pan. Carefully pour the hot water inside the pan and place in oven. (You can also place pan in over first and pour water into pan in the oven.)
- Bake cheesecake for 55 to 70 minutes or until the center is almost set. When it is done the center will jiggle slightly if you gently shake it. Turn the oven off and open the door slightly. Let the cheesecake sit in the oven in water bath and cool down for 1 hour.
- Remove from oven and water bath, then cool completely at room temperature. Then refrigerate the cheesecake for at least 4 hours to overnight.
- Use a knife to loosen the chilled cheesecake from the rim of the springform pan. Unlock and remove rim from springform pan.
- Using a clean sharp knife cut into slice for serving.
- Serve cheesecake as is or with desired toppings.
- Cover and store leftovers in the refrigerator for up to 5 days.
Want to Save this Recipe?
By submitting this form, you consent to receive emails from Soulfully Made.
Video
Nutrition Information
Nutritional Disclaimer
Soulfully Made is not a dietician or nutritionist, and any nutritional information shared is only an estimate. We recommend running the ingredients through an online nutritional calculator if you need to verify any information.
©️Soulfully Made
Dreamy, creamy and the steps are so easy to follow! Love that you can dress it up or down and the graham cracker crust! WOW!
Thank you Kathleen!
Cheesecakes are my favorite! I might just have to try your recipe this weekend!
I think every weekend is perfect for Cheesecake ;)!
As soon as I saw this on Facebook I knew I had to go and make it. It was everything I wanted it to be. And thanks for all the tips!
You are so welcome Debi! I am glad you enjoyed!