This post may contain affiliate links. Please read our disclosure policy.
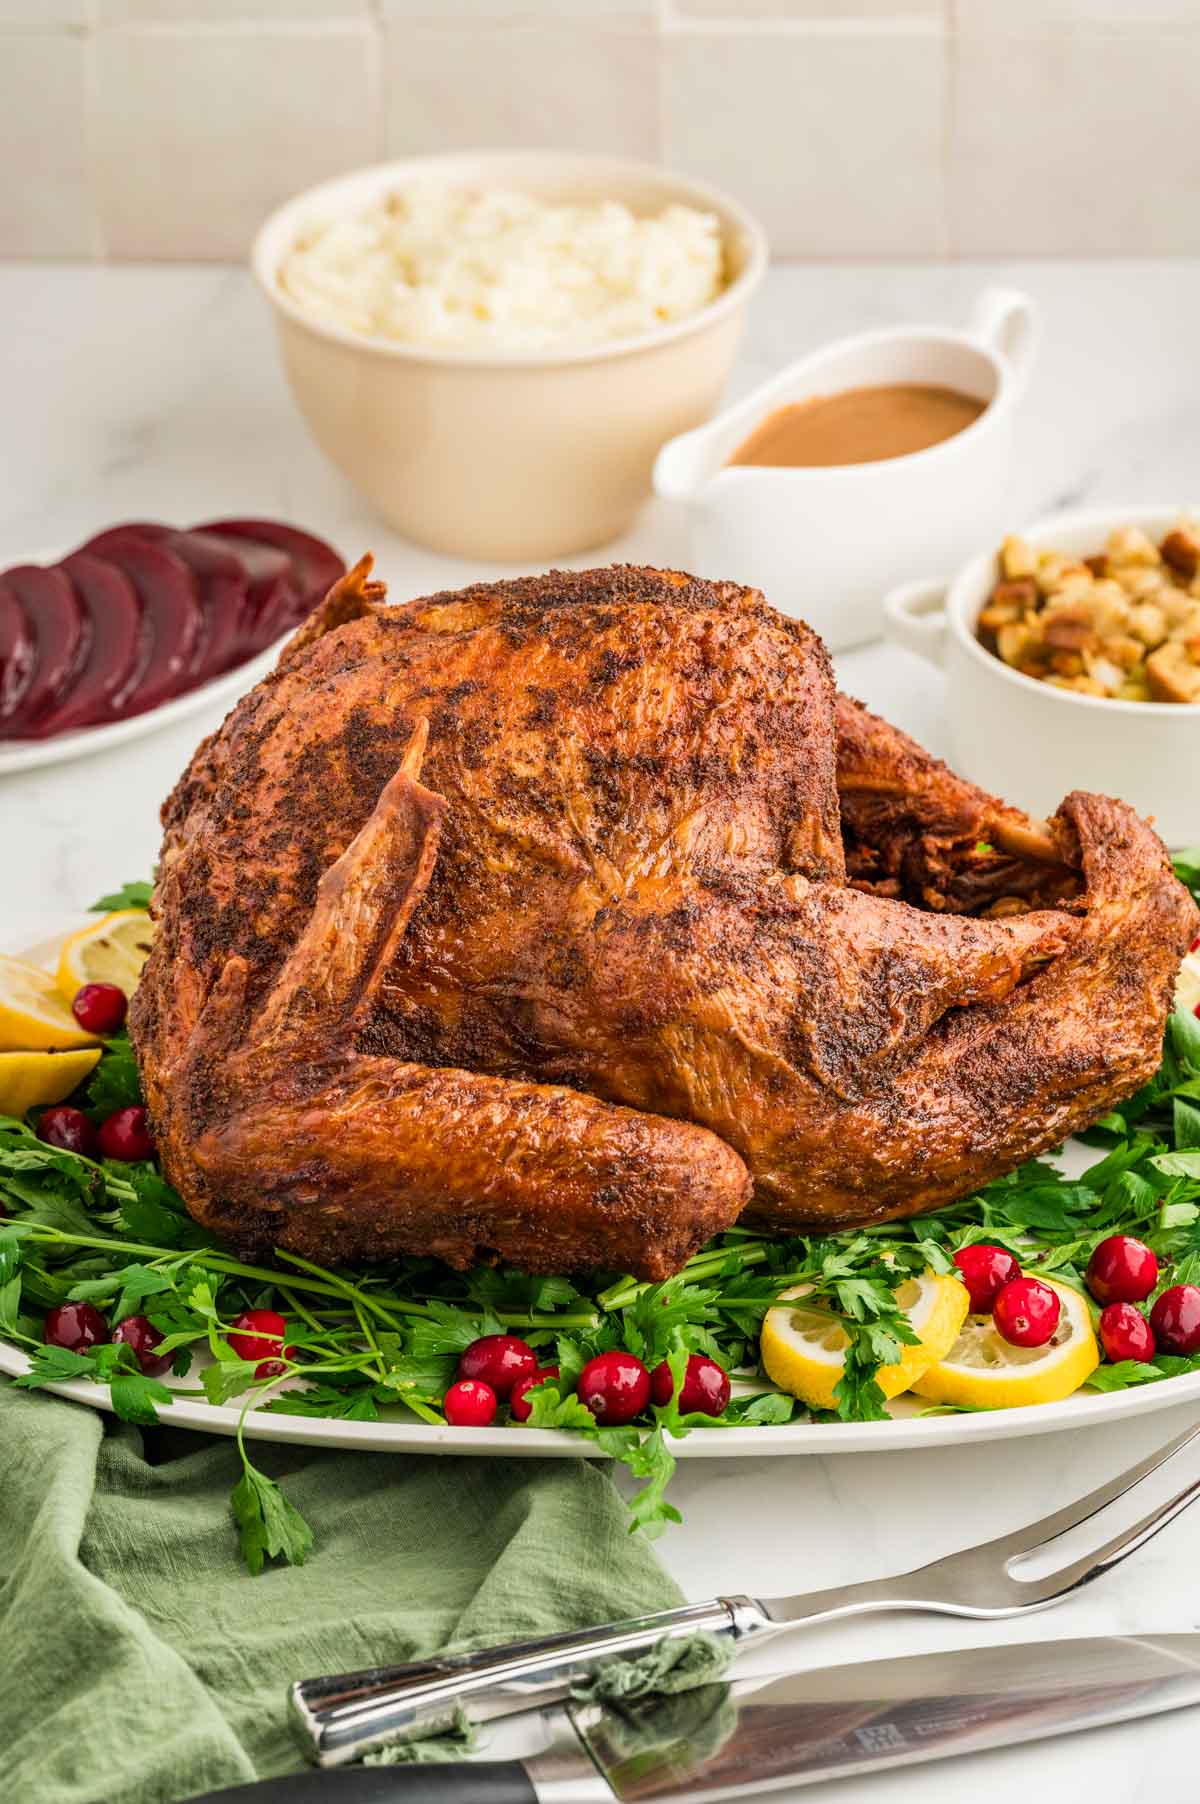
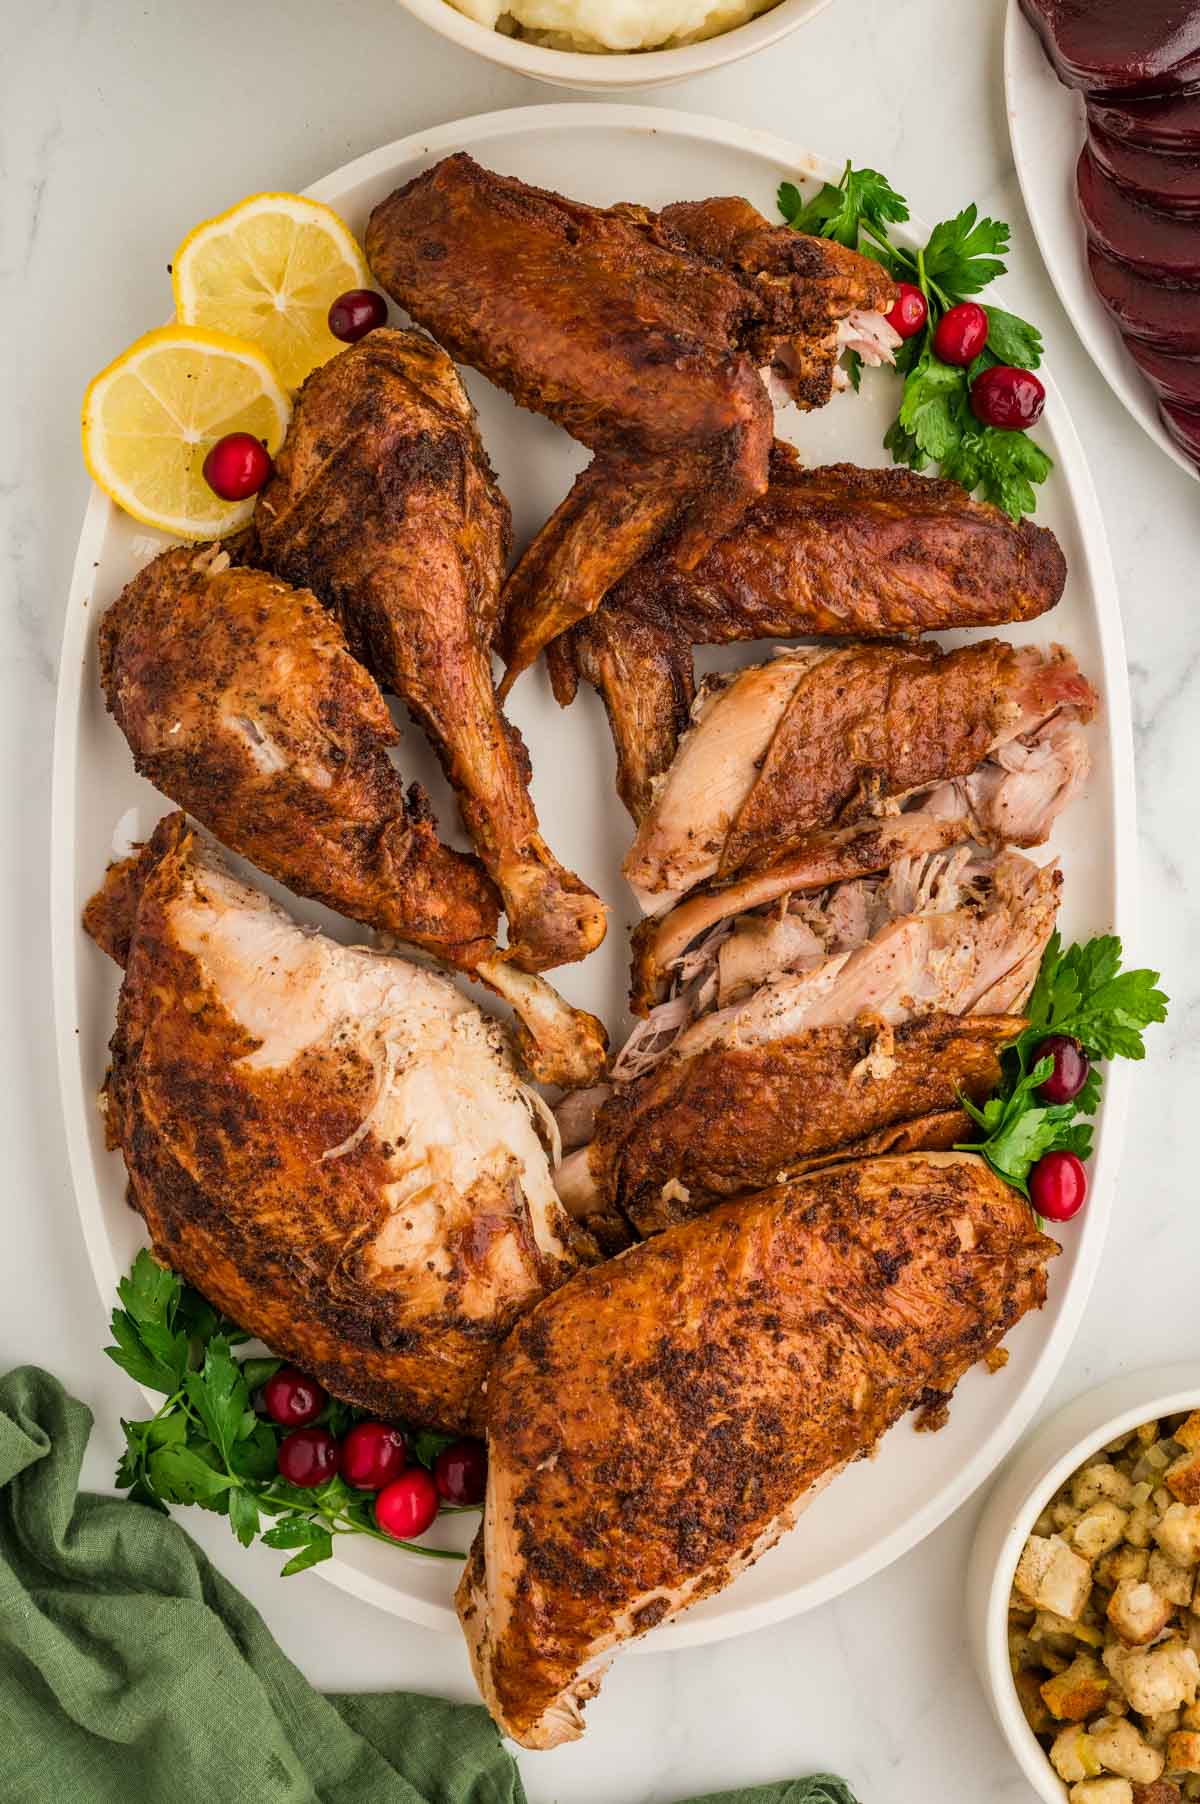
Fried turkey brings bold flavors, crispy skin, and juicy meat to the Thanksgiving table. This recipe guides you through every essential step—from thawing and seasoning to frying safely and achieving the perfect golden finish. Follow along, and you’ll master a turkey that’s crispy on the outside, tender inside, and sure to leave your guests raving!
Nikki’s Recipe Rundown
- Taste: Bold and flavorful, with crispy skin and juicy meat in every bite.
- Texture: Golden-brown, crisp on the outside, moist and tender on the inside.
- Ease: Requires prep and attention to detail but straightforward with the right tools.
- Pros: Quick cooking time, frees up oven space, and delivers melt-in-your-mouth, show-stopping results.
- Considerations: Be sure the turkey is fully thawed, monitor oil temperature, and follow safety precautions. Read all the instructions and plan ahead for the time needed.
- Recipe Repeatability: Absolutely! Once you master it, you’ll want to fry your turkey from heat on out! This is our go-to Thanksgiving Turkey each and every year!
This fried turkey recipe has been a delicious part of our family’s Thanksgiving for almost twenty years now. It all started with my sister’s in-laws, David and Shelly (who we love dearly), who have perfected the process year after year (they say about 30 years). David takes charge of the frying, and let me tell you—once we tasted that crispy, golden skin, and juicy, flavorful meat, it became our go-to turkey for the holidays.
While we appreciate a good roasted turkey, there’s just something unbeatable about the texture and moisture that deep frying brings. The seasoning might seem simple, but it’s truly the “secret sauce” that takes this turkey to the next level, keeping it perfectly moist inside, with every bite with flavor.
The tradition stuck, and now, no Thanksgiving is complete without that familiar sizzle and the unmistakable aroma of a perfectly fried bird. If you’ve never tried a fried turkey, you’re in for a treat—it’s an experience that will change the way you think about holiday meals.
Variations and Substitutions
- Oil Options: Peanut oil is the go-to for frying thanks to its high smoke point and neutral flavor. However, if peanut allergies are a concern, you can also use canola, sunflower, or corn oil as substitutes. Just ensure the oil has a smoke point above 400°F for safe frying.
- We love this exact seasoning, but if you prefer a different flavor profile, swap out Cajun or Creole seasoning with a dry turkey rub of garlic powder, paprika, thyme, and salt. You can also experiment with Italian herbs or even a barbecue spice blend to give your turkey a unique twist.
How Long Does It Take To Completely Defrost a Frozen Turkey?
Refrigerator Thawing (Safest method):
- Place the turkey (still in its packaging) on a tray or in a pan to catch any drips.
- Allow 24 hours of thawing time for every 4-5 pounds of turkey. I always give myself one extra day, just to be safe.
- Example: A 12-pound turkey will take about 3 days to thaw.
- Once thawed, the turkey can stay in the fridge for up to 2 days before cooking.
Cold Water Thawing (Faster option):
- Keep the turkey in its packaging and submerge it in cold water, making sure it’s fully covered.
- Change the water every 30 minutes to keep it cold.
- Allow 30 minutes of thawing time per pound.
- Example: A 12-pound turkey will take about 6 hours to thaw this way.
- Cook the turkey immediately after thawing.
How Much Oil Is Needed To Fry The Turkey?
The most common reason there are accidents with deep frying turkeys is because there is too much oil displacement when the turkey is lowered into boiling oil.
When frying a turkey, the amount of oil needed depends on the size of the turkey and the size of the fryer. A general rule of thumb is to use enough oil to completely submerge the turkey, but not so much that it overflows once the turkey is placed in the fryer.
Most fryers these days come with a pretty accurate chart based on the size of the turkey that you can use to determine how much oil to use with the fryer you have. So, I recommend checking your particular fryer instructions. However, if you don’t have them or want to double-check here is a way to measure (this is especially helpful for an outdoor pot-style fryer):
- Place the turkey in the fryer completely thawed (before seasoning it) into the fryer.
- Fill the fryer with water until the water is at the fill line.
- Remove the turkey and mark the water level. This is how much oil you’ll need.
- Make sure to thoroughly clean and dry the fryer before adding oil to avoid dangerous splattering when you heat the oil.
Then, follow directions to season and fry as directed in the recipe.
How To Make a Deep-Fried Turkey
✱ Be sure to see the recipe card below for exact ingredients and full recipe instructions!
Step 1 | Defrost Turkey
Thaw/Defrost turkey completely. * See How to Defrost a Turkey to determine how far ahead you need to do this.
Step 2 | Prep & Season Turkey
Start this process two days before frying/serving.
Once completely defrosted, remove the giblet bag and neck bag, rinse the turkey, and pat dry really well with paper towels.
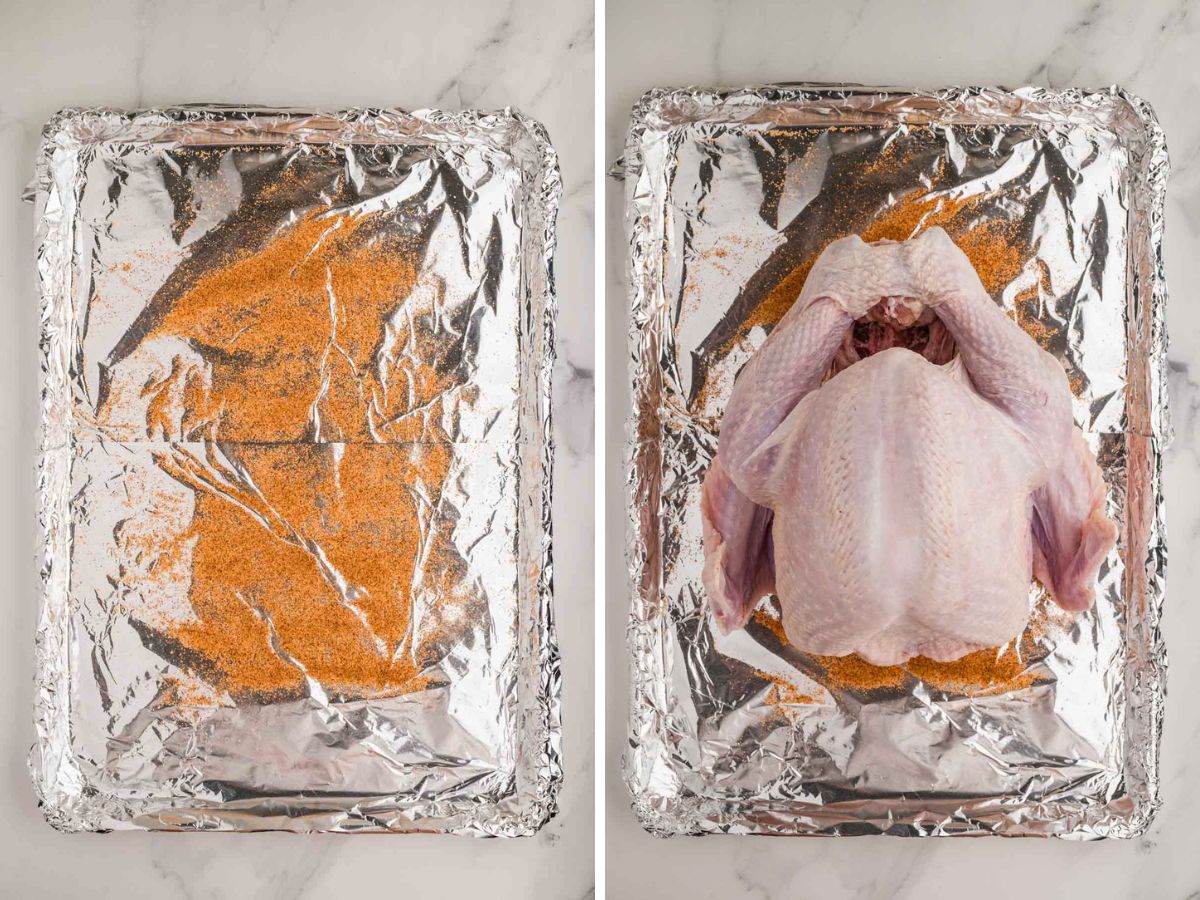
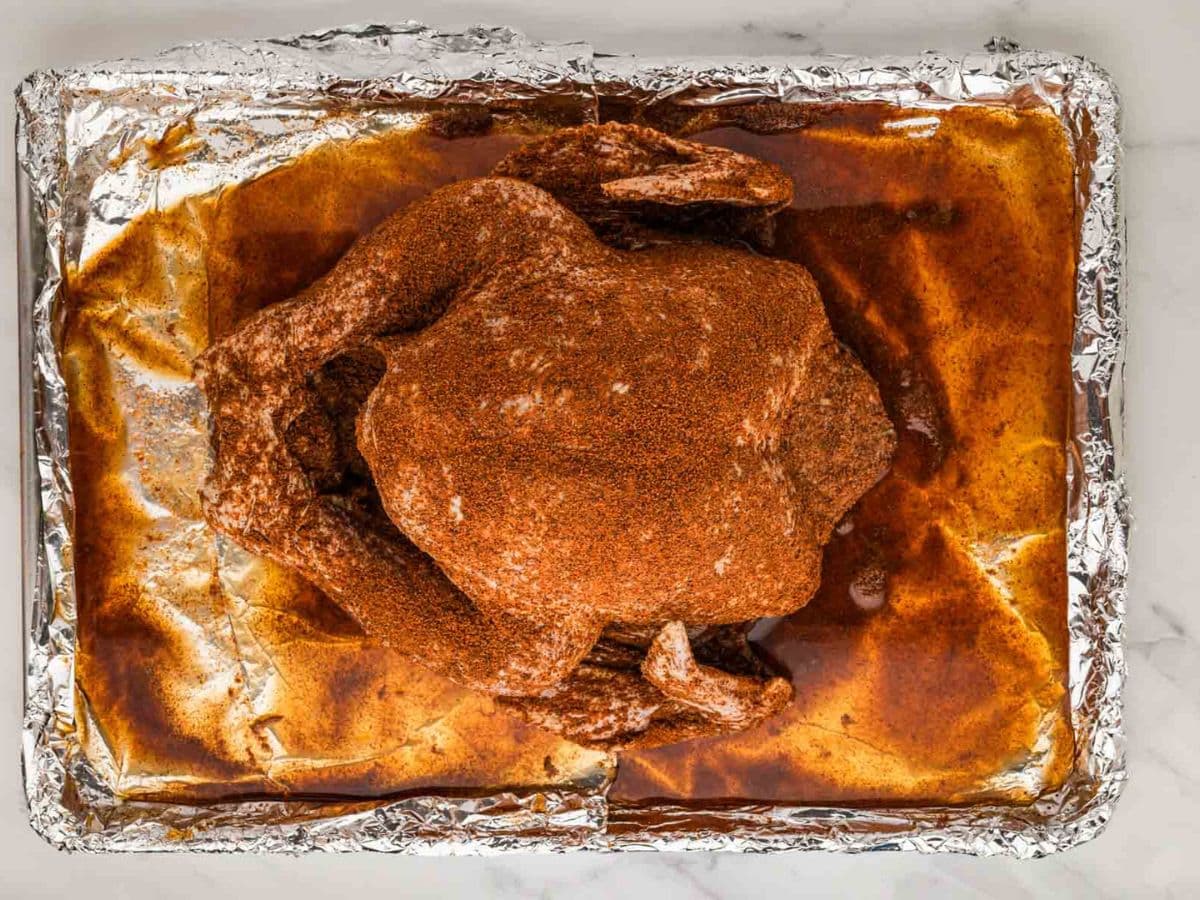
Line a sturdy-rimmed baking sheet large enough to hold your turkey with foil. Sprinkle the foil with a light dusting of the seasoning where the turkey will be placed. (Be sure the pan is rimmed, as the turkey will drain while marinating in the seasoning.)
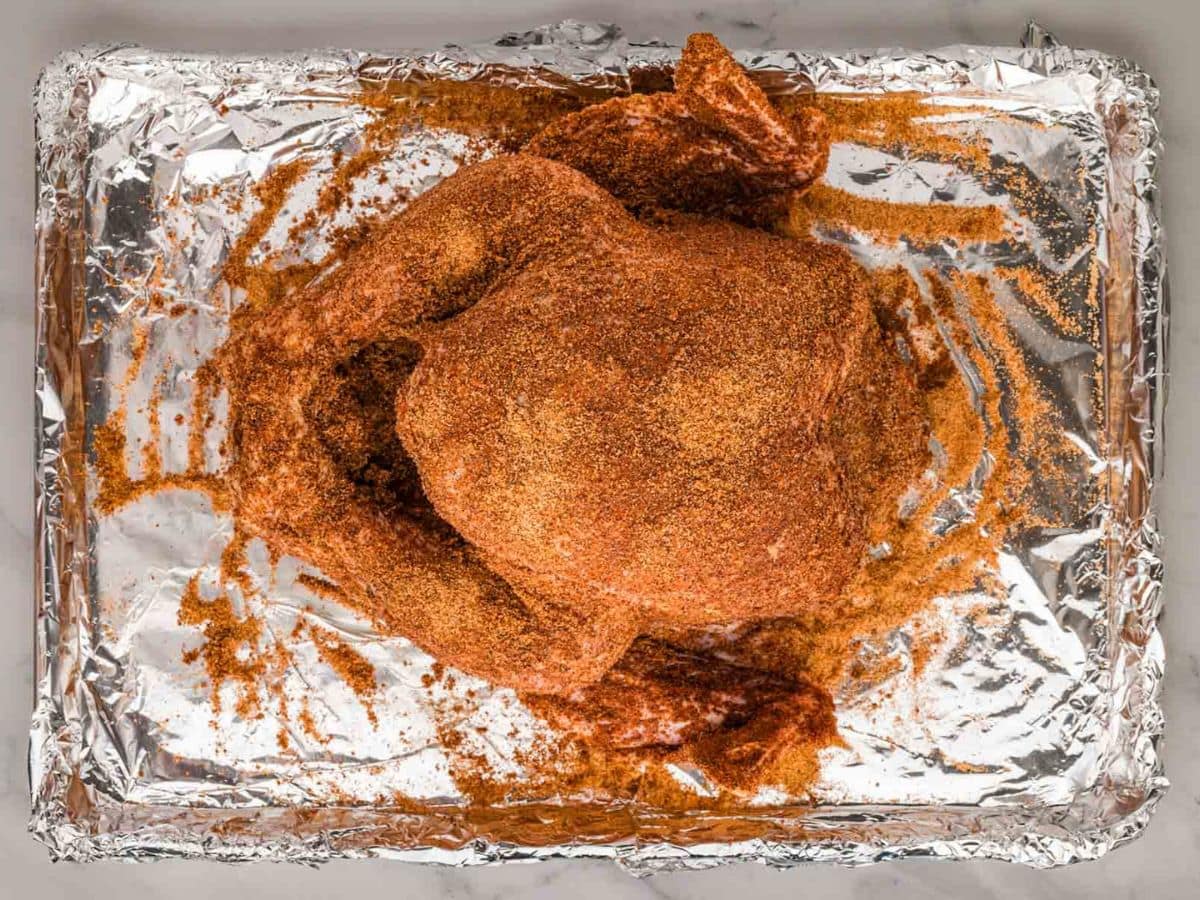
Then, generously coat the outside of the turkey with seasoning. You do not want any skin exposed, and you want to use most, if not all, of the seasoning in the bottle.
If you have some seasoning leftover, sprinkle the inside of the turkey with the remainder of the seasoning. Use the whole bottle of seasoning.
Step 3 | Cover & Refrigerate to Marinate
Place the turkey breast-side up on the baking sheet and cover with foil. Refrigerate for 2 days (this is what we do and contributes to the amazing flavor and color) or at least 24 hours until ready to cook.
Step 4 | Preheat Peanut Oil
Set up the area where you will fry the turkey. This should be in an open area, a safe distance away from anything flammable.
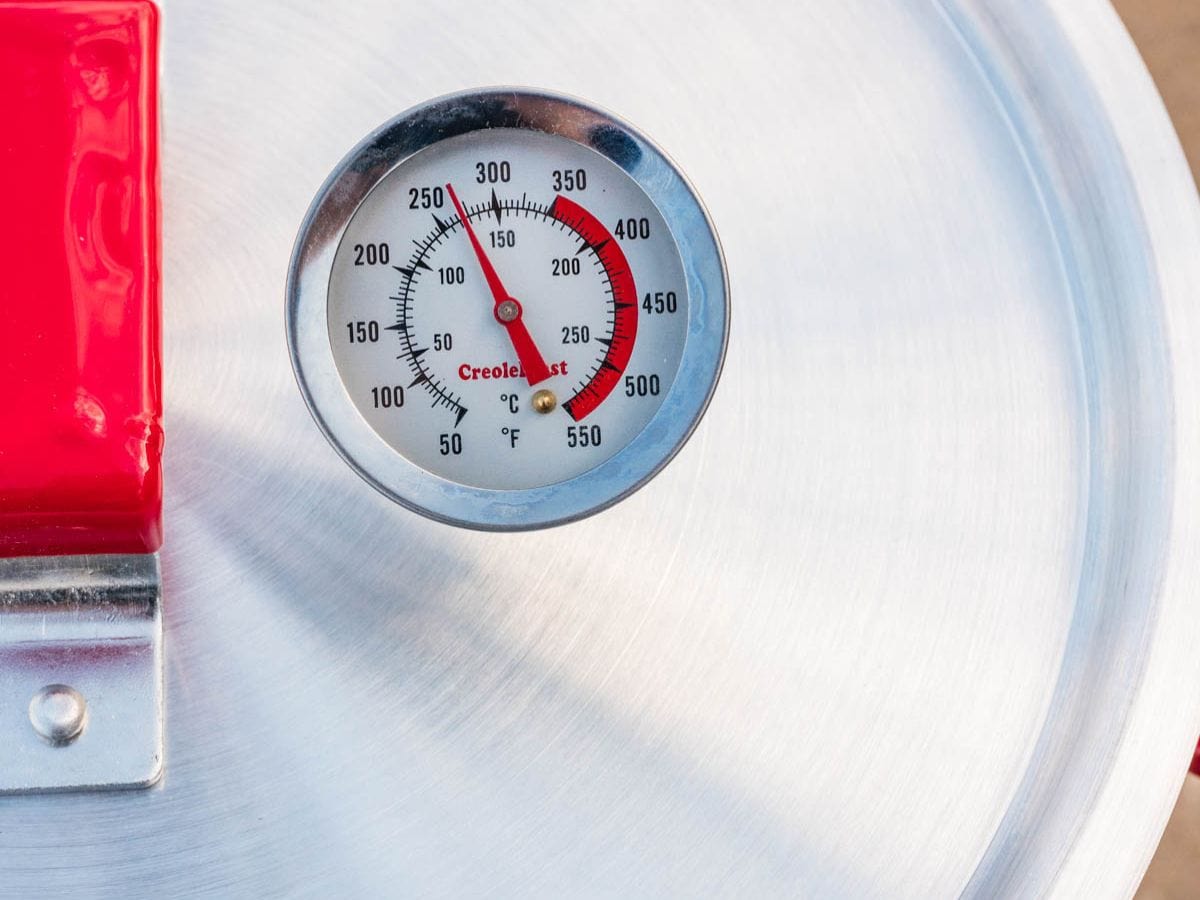
Preheat peanut oil to 275℉ (If using an Indoor Electric Fryer, preheat to 375℉). This can take 45 minutes up to an hour. *See the tips to determine How Much Oil You Will Need. Use a thermometer to test the oil temperature.
Step 4 | Deep Fry Turkey in Peanut Oil
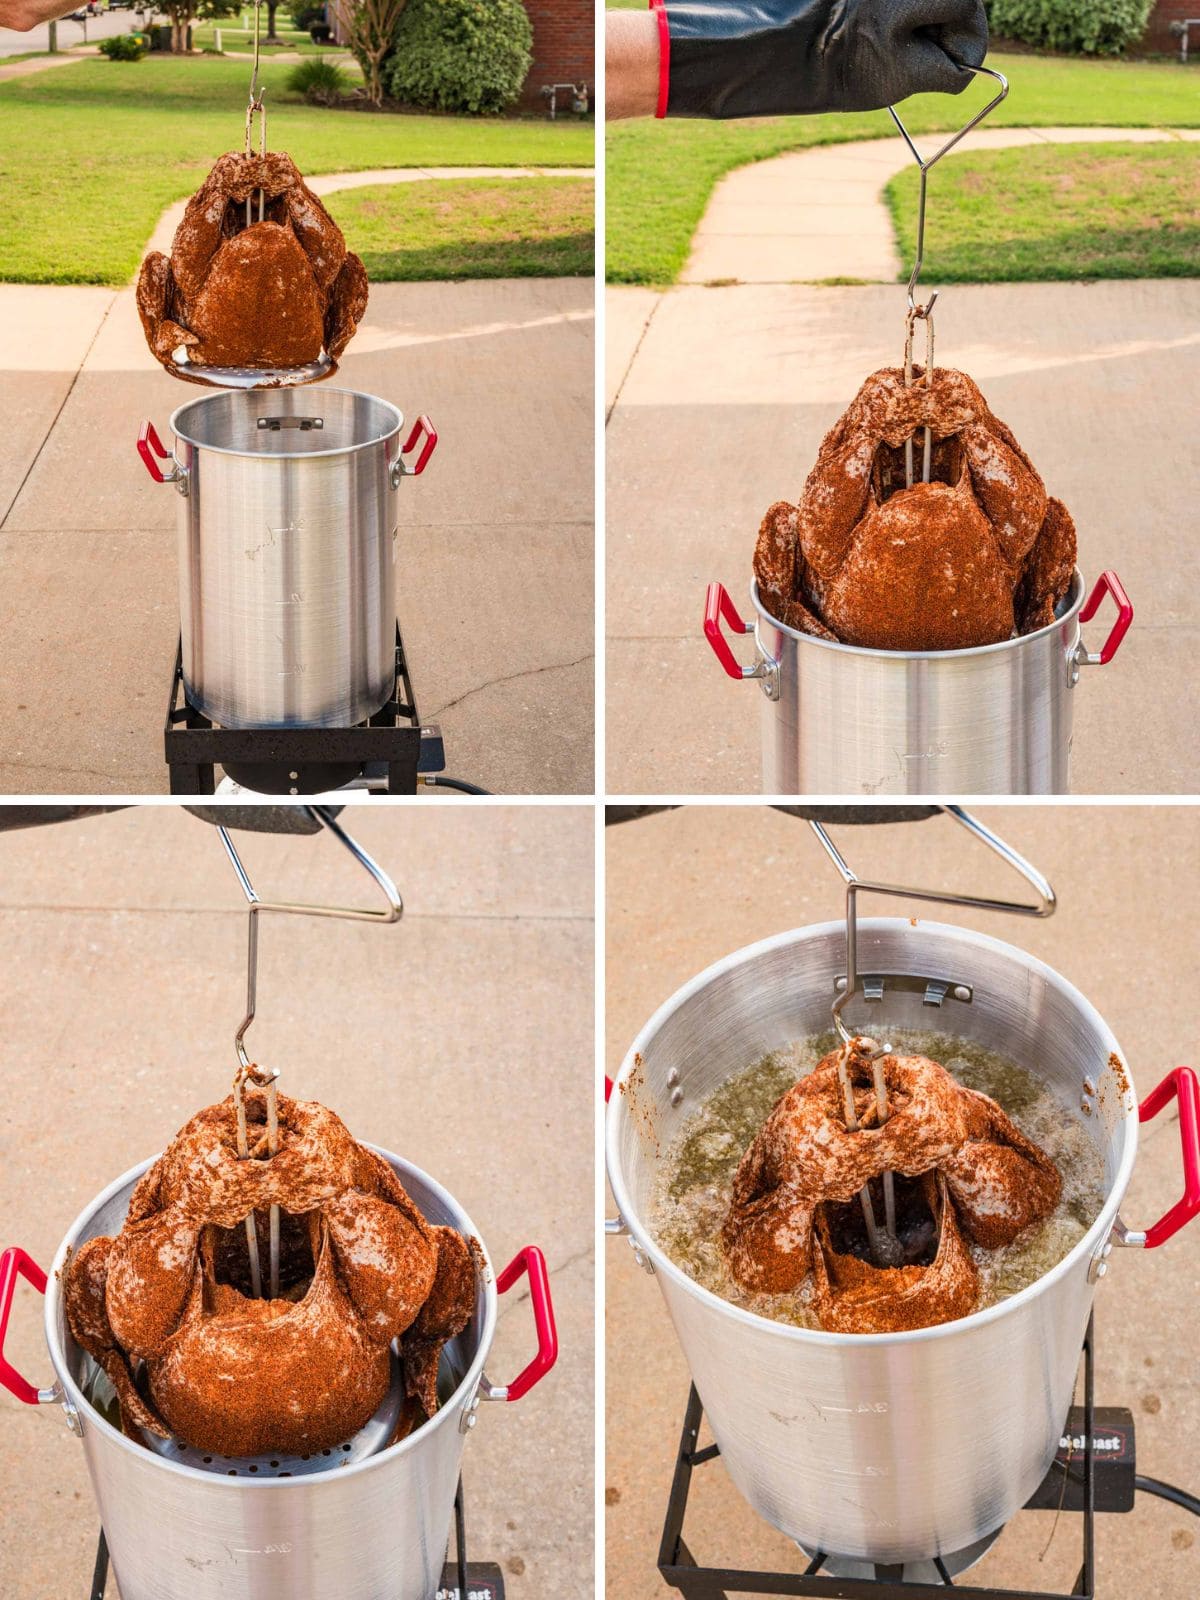
When the oil reaches temperature, securely insert the hanger into the turkey or add the turkey to the basket (this hanger and basket will vary with fryers).
Wear long gloves to protect your arms and hands from oil splatter.
Very carefully and slowly, lower the turkey into the pot.
When using an outdoor gas fryer, allow oil to heat back up to 325℉.
When using an indoor electric fryer, keep the temperature set to 375℉.
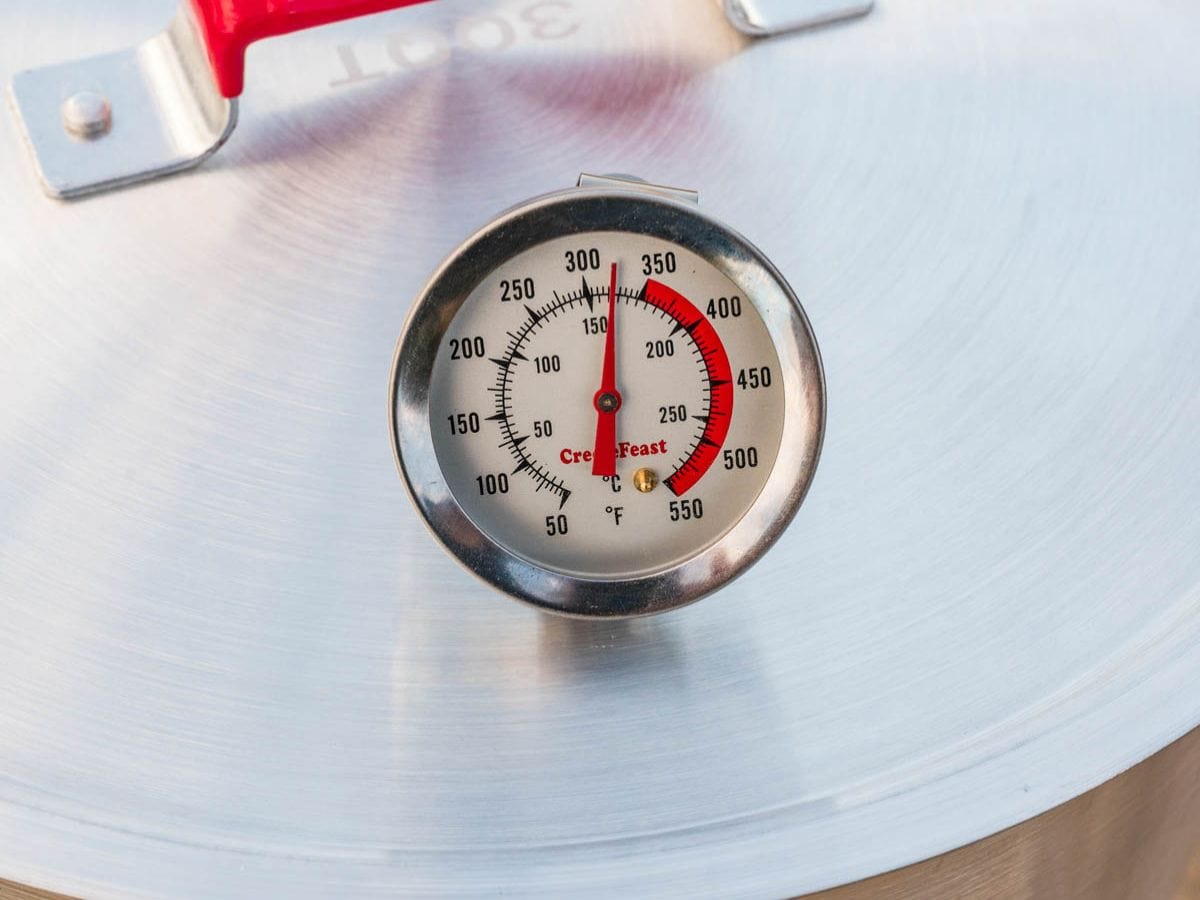
If your fryer has a hole for a probe in the top, insert a long thermometer probe or chef alarm into the turkey to monitor the internal team.
Then, close the lid.
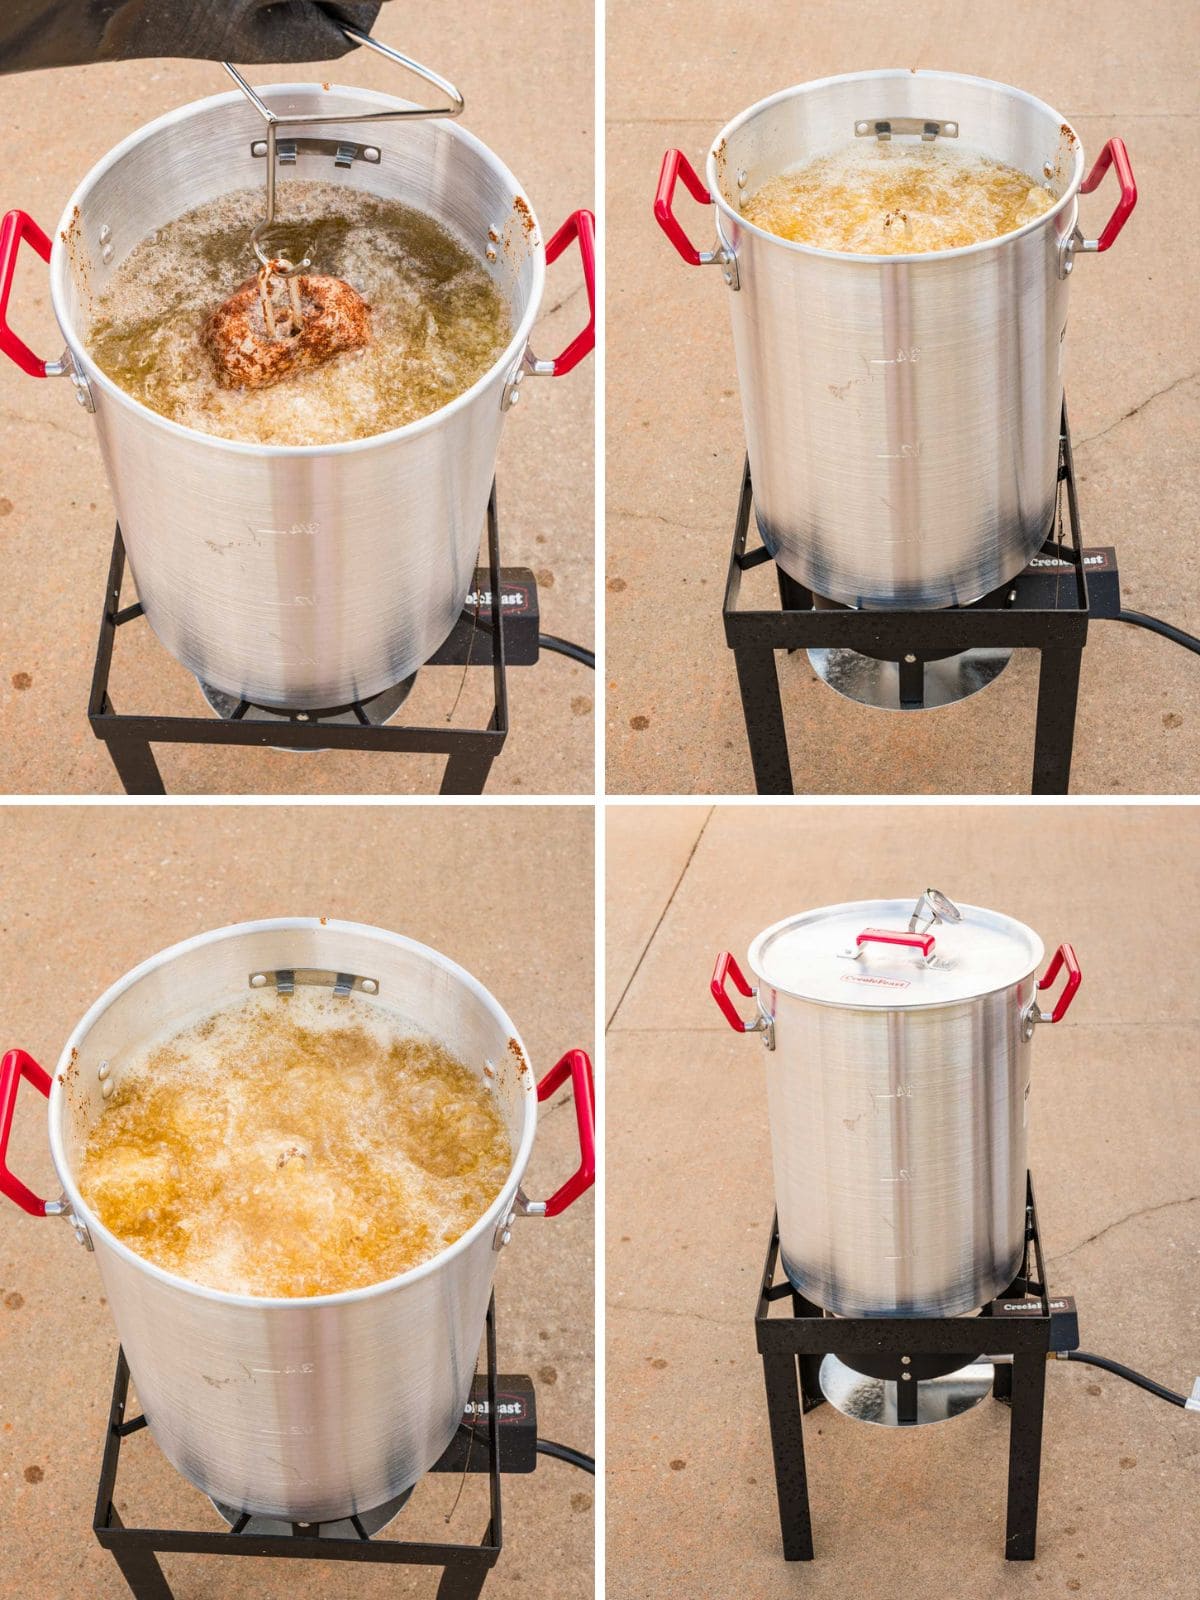
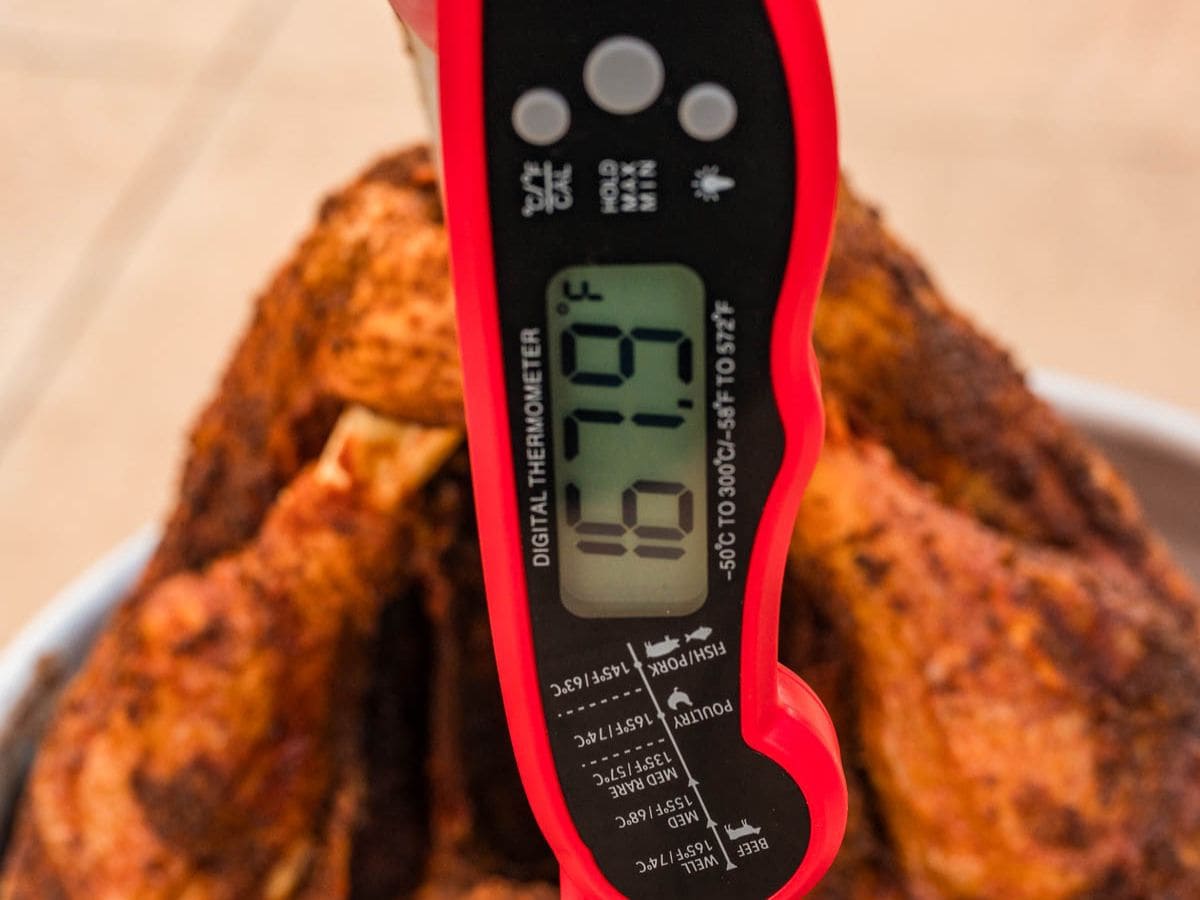
Cook the turkey until its internal temperature reaches 165℉ (about 3-5 minutes per pound).
Test with an instant-read thermometer in the thickest part of the breast.
Step 5 | Remove, Rest & Serve
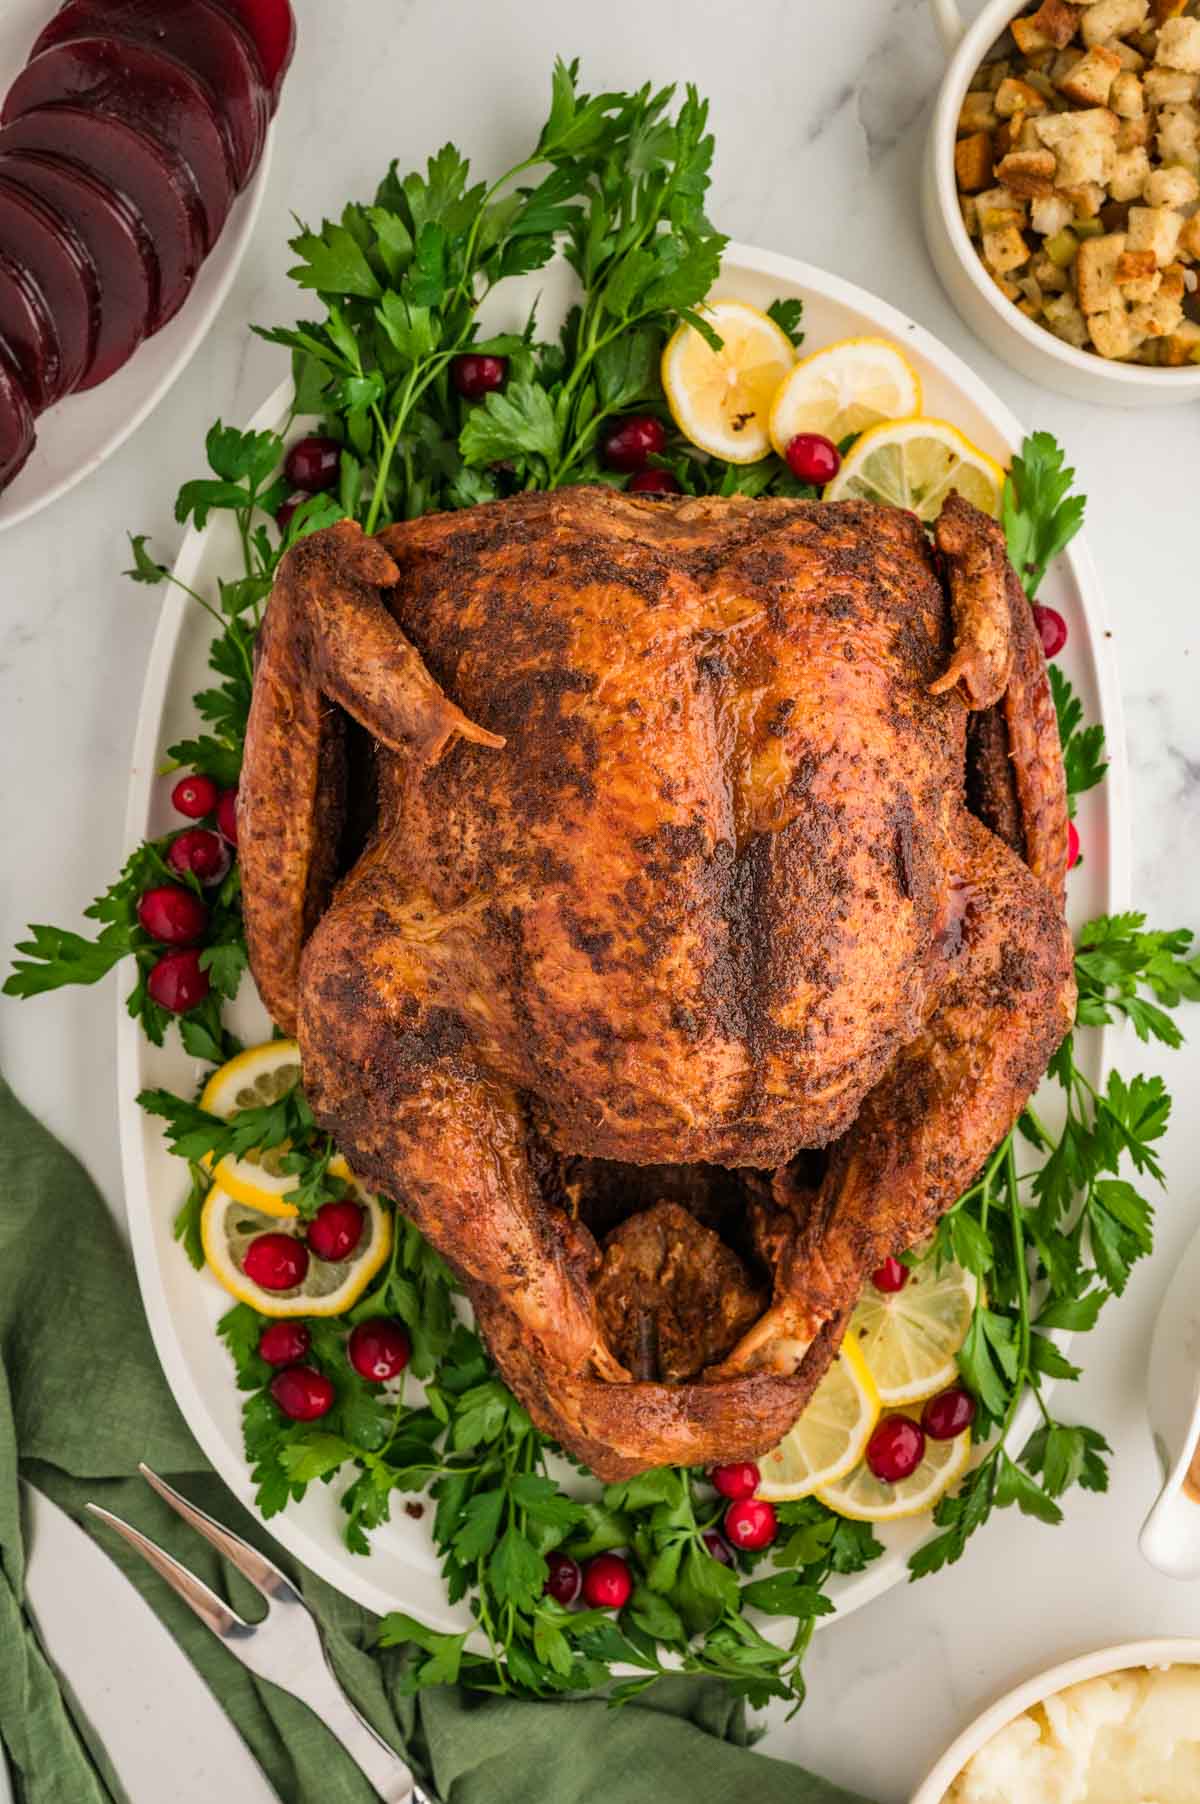
When done, carefully lift the turkey out of the fryer to a tray or large serving tray.
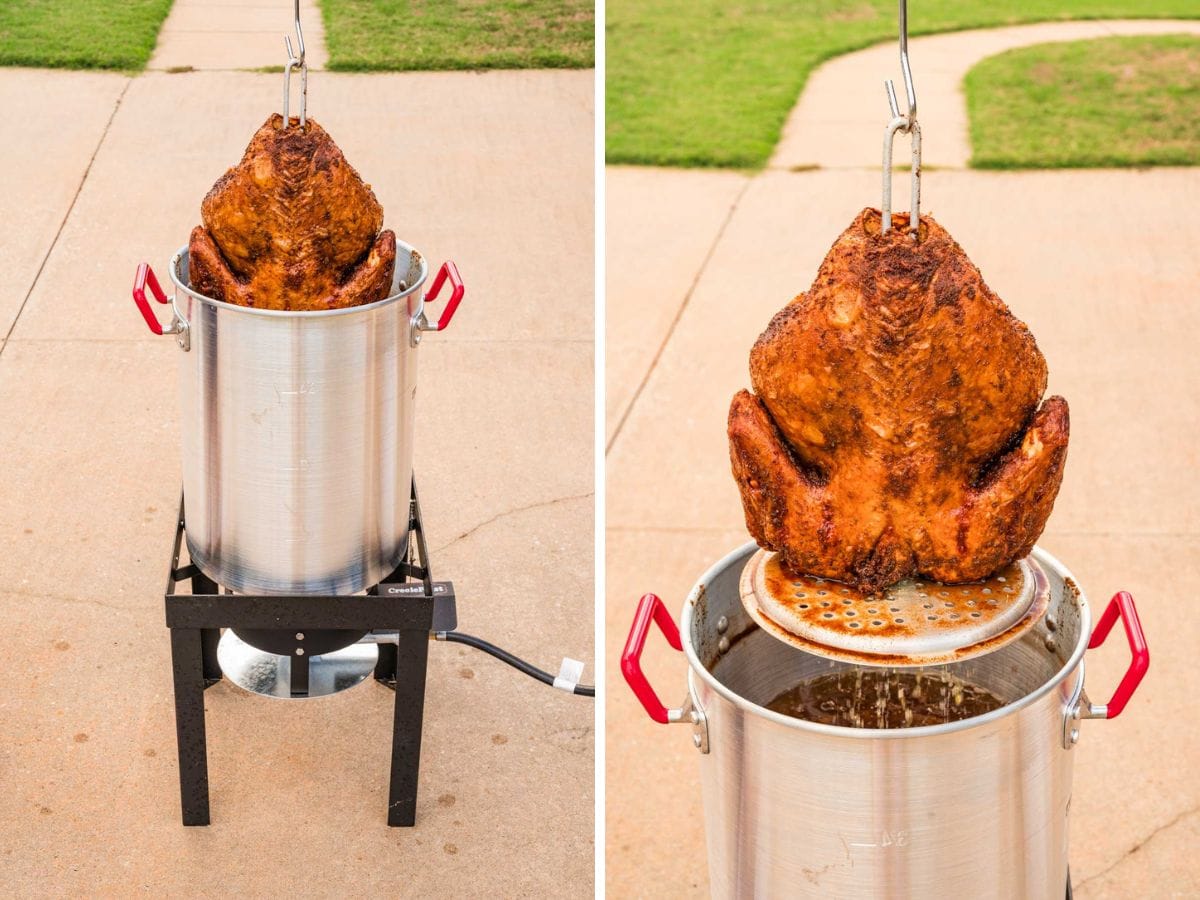
Let rest for about 20-25 minutes before carving and serving!
Want to Save this Recipe?
By submitting this form, you consent to receive emails from Soulfully Made.
How to Use an Electric Fryer to Make Fried Turkey
Last year, we gave the Masterbuilt XL Electric Fryer a try, and we were impressed with the results.
- This method uses less oil and doesn’t involve an open flame like a traditional gas fryer, which makes it a safer option.
- With an electric fryer, you get controlled, even heating, making it easier to manage the cooking process from start to finish.
- You can use an electric fryer indoors or outdoors.
- We were able to cook a large (19.34 pound) turkey in this fryer.
Use the same cooking instructions as above except for the cooking temperature. Preheat an electric fryer to 375℉ and follow the instructions in the recipe.
Recipe Tips for Deep Fried Turkey
- You can wear gloves when handling the meat if desired.
- Don’t Disturb Skin: When I bake a turkey, I always put the turkey seasoning under the skin. Here, we are trying not to disturb the skin and to keep it intact. We are frying the outside to crispy and keeping the inside of the bird juicy and tender. So, no need to pull the skin up.
- Use the whole bottle of seasoning. I promise it’s not too much. Our whole family eats this, even the littles. It’s not too spicy. It’s just really flavorful and perfectly moist.
How to Store Peanut Oil After Frying a Turkey?
Follow these steps, and your peanut oil will stay fresh and good to go for months! Just keep an eye on it—if it starts looking cloudy, smells off, or gets foamy when you heat it, it’s time to toss it and grab a new batch.
- Cool the Oil Completely: Allow the oil to cool to room temperature in the fryer before handling it. This prevents burns and makes it easier to manage.
- Strain the Oil: Use a fine-mesh strainer or cheesecloth to remove any food particles or debris. Skipping this step can lead to spoilage or off-flavors over time.
- Store in an Airtight Container: Pour the filtered oil into its original container (if available) or a clean, airtight container. Make sure the container is dry to avoid water contamination.
- Label with Date: Note the date you used the oil and how many times it’s been reused to keep track of its quality. Peanut oil can typically be reused 3 to 4 times, as long as it hasn’t developed off-flavors or a dark color.
- Store in a Cool, Dark Place: Keep the oil in a pantry, cabinet, or other dark area. If the room is warm, you can store it in the fridge to extend its shelf life, though it may solidify—simply bring it to room temperature before using again.
Follow these steps, and your peanut oil will stay fresh and good to go for months! Just keep an eye on it—if it starts looking cloudy, smells off, or gets foamy when you heat it, it’s time to toss it and grab a new batch.
Recipe FAQs
You may see many recipes that inject the turkey, and you can if you would like. This recipe has been tested and cooked to tender perfection for 30 years without injecting our turkey. Tony’s does have an injectable if you are set on using an injection method.
If you follow the recipe and start frying at a lower temperature, around 275°F, then raise it to 325°F-350°F. If the turkey seems to brown too fast, remove it at 155°F and let the carryover heat bring it up to 165°F. Just be certain it reaches 165°F before consuming it.
How to Store Leftover Turkey
Cool the Turkey Quickly: Let the turkey rest briefly after carving, but don’t leave it at room temperature for more than 2 hours. Cooling it promptly helps prevent bacterial growth.
Portion and Store in Airtight Containers: Slice or shred the leftover turkey into portions, removing from the bones and store them in airtight containers or resealable bags. Make sure to remove as much air from the bags as possible. Storing in portions will make it easy to grab what you need without exposing the whole batch to air each time.
Refrigerate: Leftovers last 3-4 days. For the best shelf life, store them in the coldest part of your fridge.
In the Freezer: For longer storage, freeze turkey in airtight containers or freezer bags. Turkey can last up to 3 months in the freezer. Be sure to label the date to keep track of how long it’s been stored.
Reheat Safely: When reheating, make sure the turkey reaches an internal temperature of 165°F. You can reheat it in the oven, microwave, or stovetop. Adding a little broth or gravy helps prevent it from drying out.
What to Serve with Thanksgiving Turkey
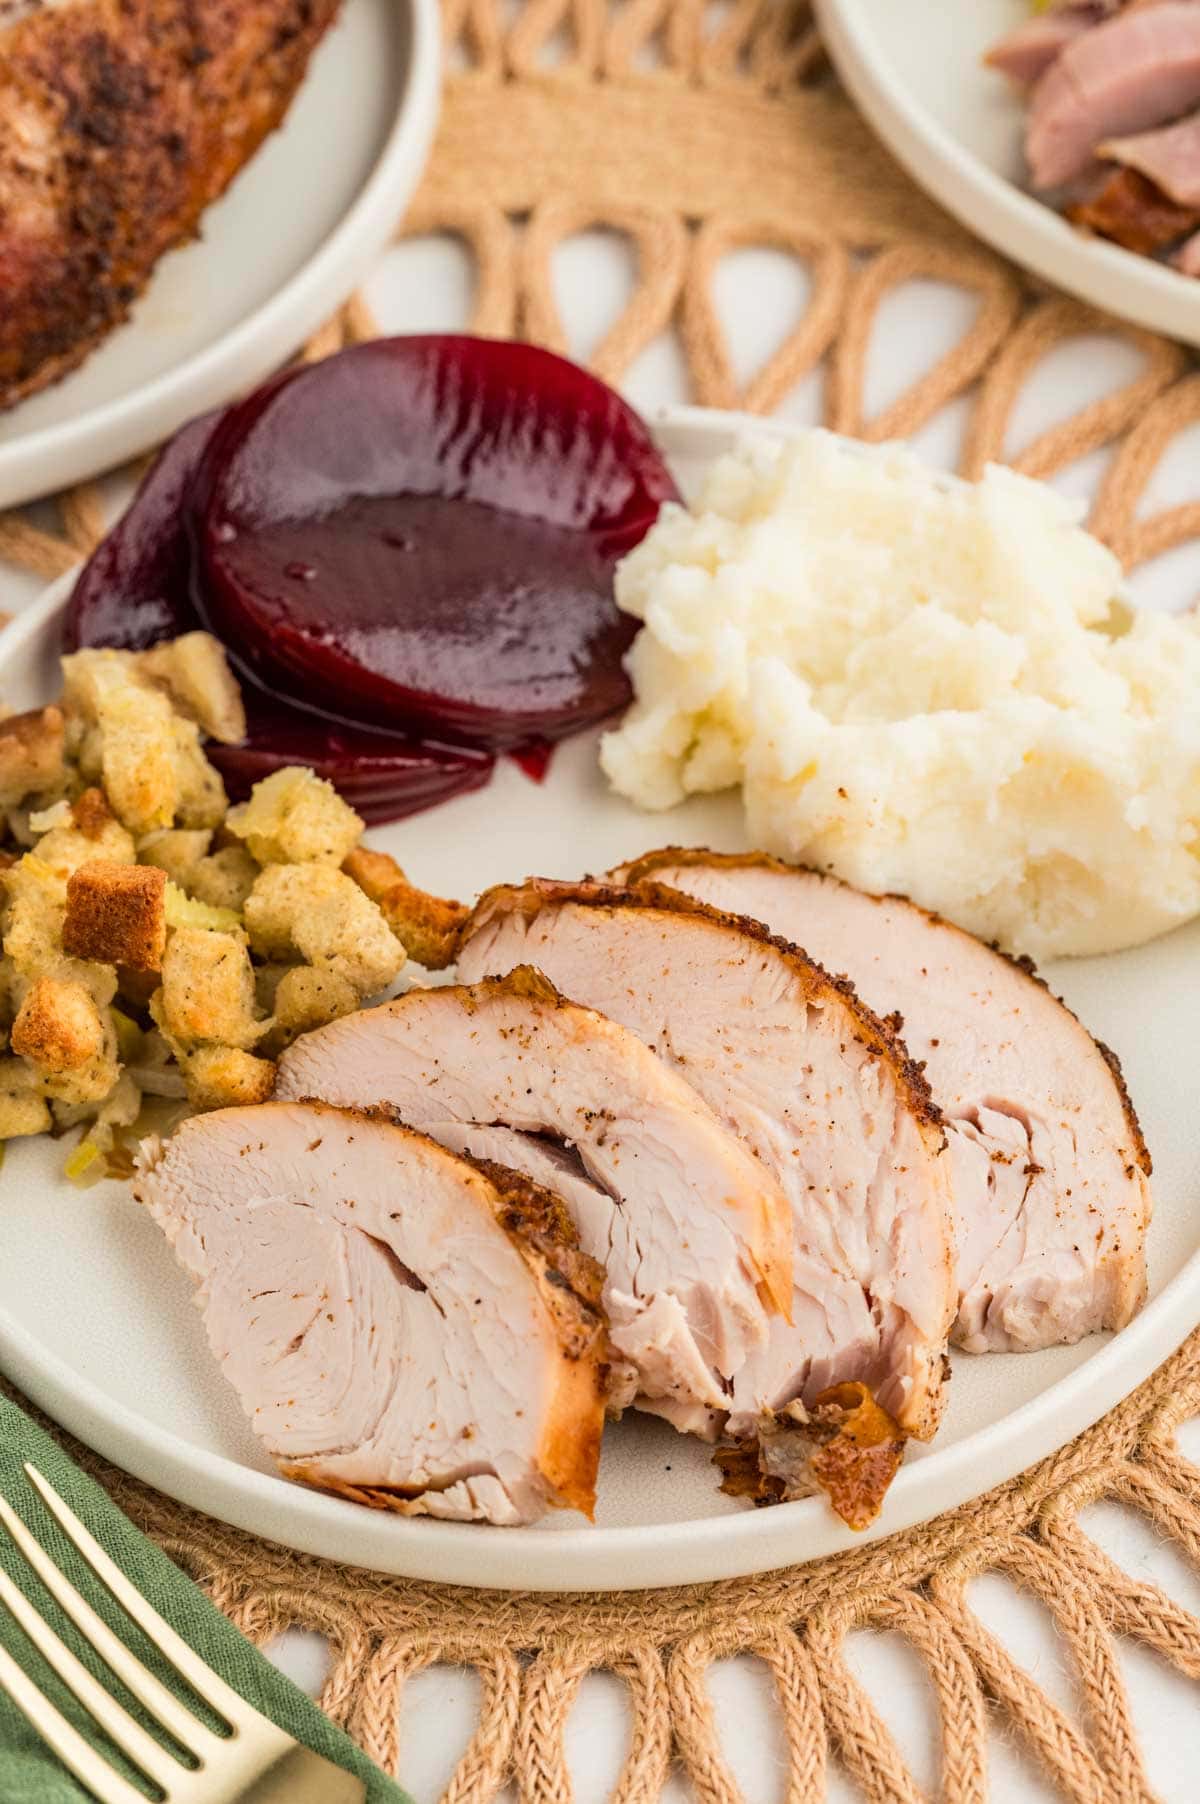
Our Thanksgiving menu offers many options, traditional sides, and desserts. Below are a few ideas. For more Holiday meal ideas, visit our Thanksgiving or Christmas pages to complete the menu. And don’t forget the Homemade Turkey Gravy to top off your turkey!
Hungry for more easy, home-cooked, delicious recipes?
Sign up for my free recipe club to get family-friendly recipes in your inbox each week! Find me sharing daily meal-time inspiration on Pinterest, Facebook, and Instagram.
Fried Turkey Recipe
Ingredients
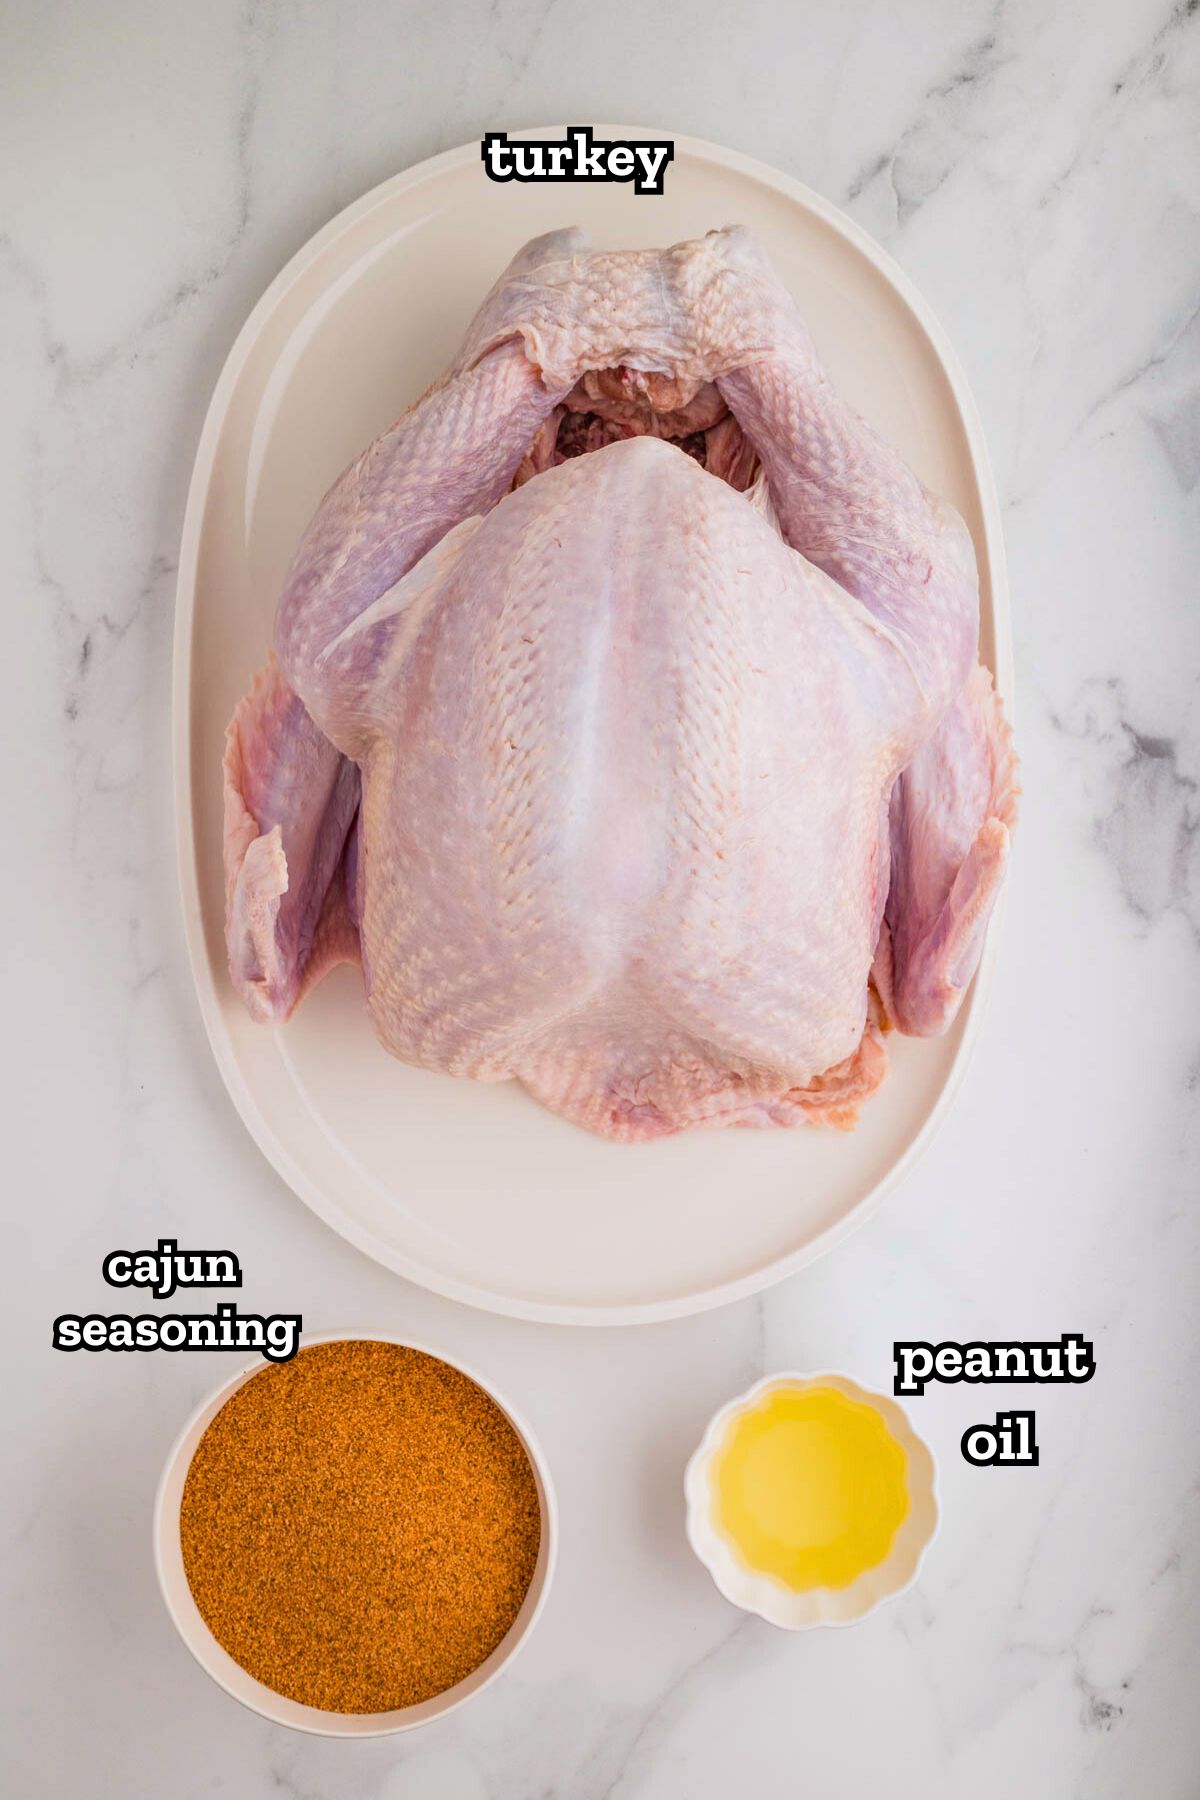
- 14 – 16 pound Turkey, defrosted
- 17 ounce Tony Chachere’s Seasoning, dry seasoning
- 3 to 5 gallons Peanut Oil, (this will depend on the size of the turkey and the fryer) See How to Determine How Much Oil to Use Notes
Instructions
For Prepping the Turkey
- Thaw/Defrost turkey completely. *See tips in Notes.14 – 16 pound Turkey
- Two days before frying/serving:Once completely defrosted, remove the giblet bag and neck bag, rinse the turkey, and pat dry really well with paper towels.
- Line a sturdy-rimmed baking sheet large enough to hold your turkey with foil. Sprinkle the foil where the turkey will be placed with a light dusting of the seasoning. (Be sure the pan is rimmed as the turkey will drain while marinating in the seasoning.)17 ounce Tony Chachere’s Seasoning
- Then generously cover the outside of the turkey all over with seasoning (you do not want any skin exposed and you want to use the majority if not all of the seasoning in the bottle. If you have some seasoning leftover, sprinkle the inside of the turkey with the remainder of seasoning. Use the whole bottle of seasoning.
- Place the turkey breast side up on the baking sheet and cover with foil. Place in the refrigerator for 2 days (this is what we do and contributes to the amazing flavor and color) or at least 24 hours until ready to cook.
For Frying the Turkey
- Set up the area where you will fry the turkey. This should be in an open area, a safe distance away from anything flammable.
- Preheat peanut oil to 275℉ (If using an indoor electric fryer preheat to 375℉). This can take 45 minutes up to an hour. *See the tips below to determine how much oil you will need. Use a thermometer to test the oil temperature.3 to 5 gallons Peanut Oil
- When the oil reaches temperature, securely insert the hanger into the turkey or add the turkey to the basket (this will vary with fryers). Very carefully and slowly, lower the turkey into the pot. Wear long gloves to protect your arms and hands from oil splatter. If your fryer has a hole for a probe in the top, insert a long thermometer probe or chef alarm into the turkey to monitor the internal temperature. Then, close the lid.When using an outdoor gas fryer, allow oil to heat back up to 325℉.When using an indoor electric fryer, keep the temperature set to 375℉.
- Cook until the internal temperature of the turkey reaches 165℉ (about 3-5 minutes per pound). Test with an instant-read thermometer in the thickest part of the breast.
- When done, carefully lift the turkey out of the fryer to a tray or large serving tray. Let rest for about 20-25 minutes before carving.
Want to Save this Recipe?
By submitting this form, you consent to receive emails from Soulfully Made.
Notes
How to Use an Electric Fryer to Make Fried Turkey
Last year, we tried the Masterbuilt XL Electric Fryer and were impressed with its results.- This method uses less oil and doesn’t involve an open flame like a traditional gas fryer, which makes it a safer option.
- With an electric fryer, you get controlled, even heating, making it easier to manage the cooking process from start to finish.
- You can use an electric fryer indoors or outdoors.
- We were able to cook a large (19.34 pound) turkey in this fryer.
How to Store Leftover Turkey
Cool the Turkey Quickly: Let the turkey rest briefly after carving, but don’t leave it at room temperature for more than 2 hours. Cooling it promptly helps prevent bacterial growth. Portion and Store in Airtight Containers: Slice or shred the leftover turkey into portions, removing it from the bones. Store it in airtight containers or resealable bags, making sure to remove as much air from the bags as possible. Storing in portions will make it easy to grab what you need without exposing the whole batch to air each time. Refrigerate: Leftovers last 3-4 days. For the best shelf life, store them in the coldest part of your fridge. In the Freezer: For longer storage, freeze turkey in airtight containers or freezer bags. Turkey can last up to 3 months in the freezer. Be sure to label the date to keep track of how long it’s been stored. Reheat Safely: When reheating, make sure the turkey reaches an internal temperature of 165°F. You can reheat it in the oven, microwave, or stovetop. Adding a little broth or gravy helps prevent it from drying out.Nutrition Information
Nutritional Disclaimer
Soulfully Made is not a dietician or nutritionist, and any nutritional information shared is only an estimate. We recommend running the ingredients through an online nutritional calculator if you need to verify any information.
©️Soulfully Made


