


This post may contain affiliate links. Please read our disclosure policy.
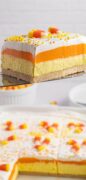
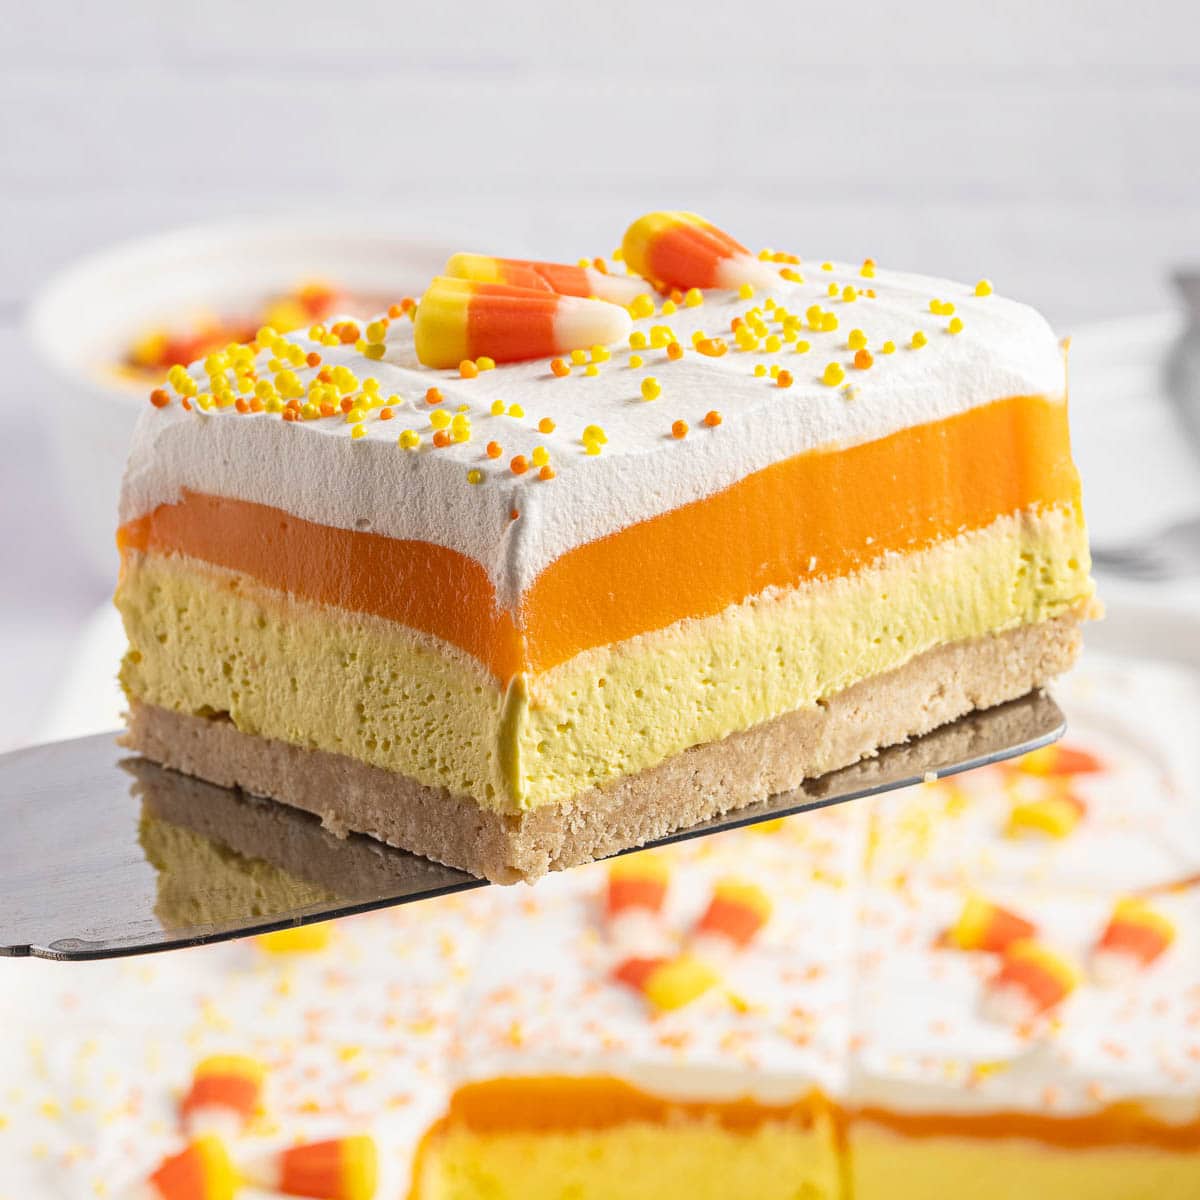
As the leaves start to change, it’s time to embrace the spirit of Halloween with something sweet! This No-Bake Candy Corn Lush is the perfect dessert to bring people together at your Halloween parties. The three separate layers in this no-bake dessert are inspired by everyone’s favorite autumn candy: candy corn!
Nikki’s Recipe Rundown
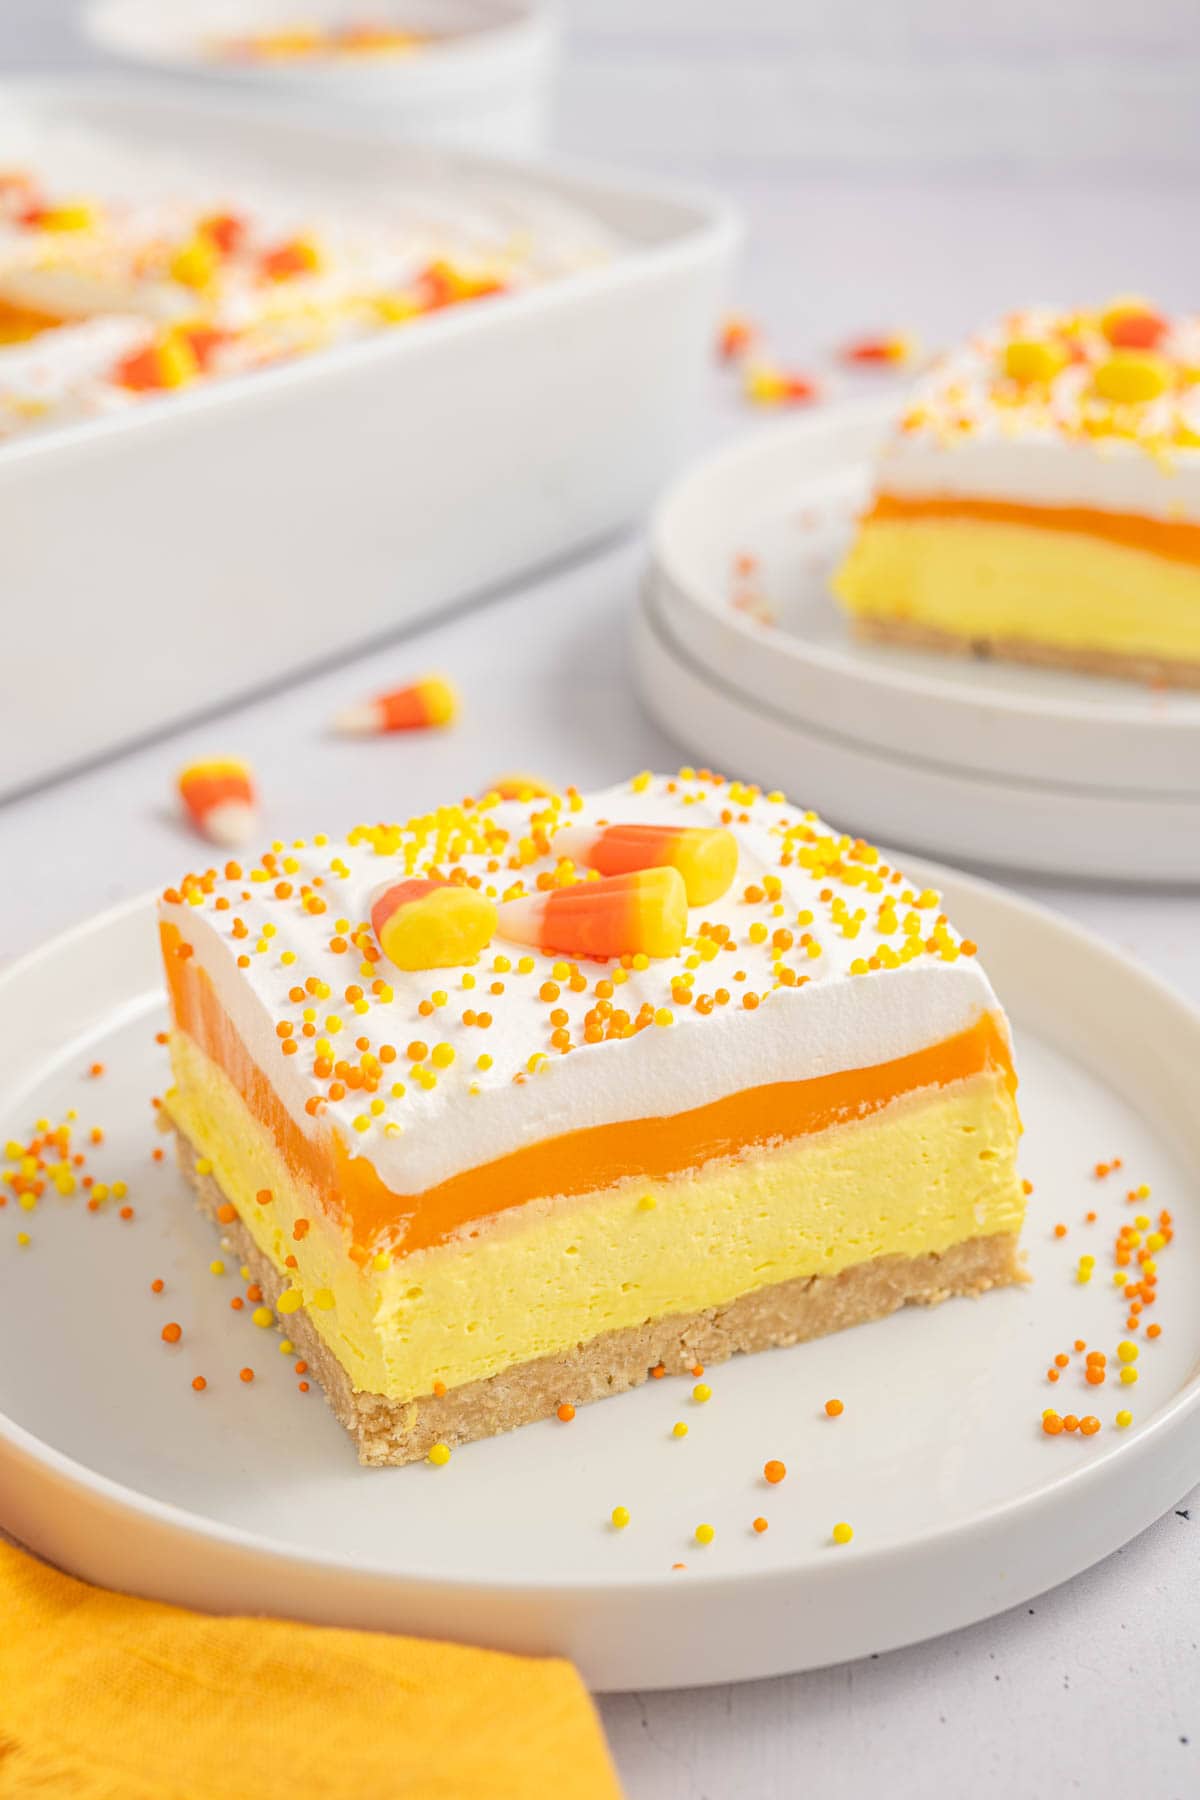
- Taste: Sweet, creamy, and full of fall flavor with hints of vanilla and marshmallow. Even if you’re not a candy corn fan, this one’s a winner.
- Texture: In every bite, layers of smooth cheesecake, fluffy pudding, and airy whipped topping are balanced by crunchy golden Oreo cookie crust. This combination of textures makes it feel light yet indulgent.
- Ease: Super simple— whip up each layer, add them to the dish, and let the fridge do the rest.
- Pros: No baking, no complicated steps, and you’ll have a crowd-pleaser for your Fall or Halloween gathering.
- Considerations: The hardest part is waiting for no-bake desserts to set—give this one at least 4 hours to chill. But the upside? It’s the perfect make-ahead treat for parties!
- Recipe Repeatability: Once you make this, it’s bound to become a go-to Halloween dessert each year. The vibrant layers mimic the classic colors of fall, making it too good not to keep in your dessert lineup.
As soon as fall hits, I’m all about cozy gatherings with friends and family. The season brings warm, comforting flavors—and, of course, some of my favorite Halloween-themed recipes.
Now, I get it—candy corn isn’t everyone’s favorite. But trust me, whether you love it or not, this candy corn lasagna is a hit. Every year at our Halloween party, friends and family head straight for this dessert. It’s inspired by candy corn but has that irresistible and delicious homemade flavor.
The best part? It’s a no-fuss, no-bake treat. You can whip it up in no time, giving you more moments to enjoy with your people and all the fun Fall festivities! After all, that’s what it’s all about.
Ingredients Needed For a No-Bake Halloween Dessert
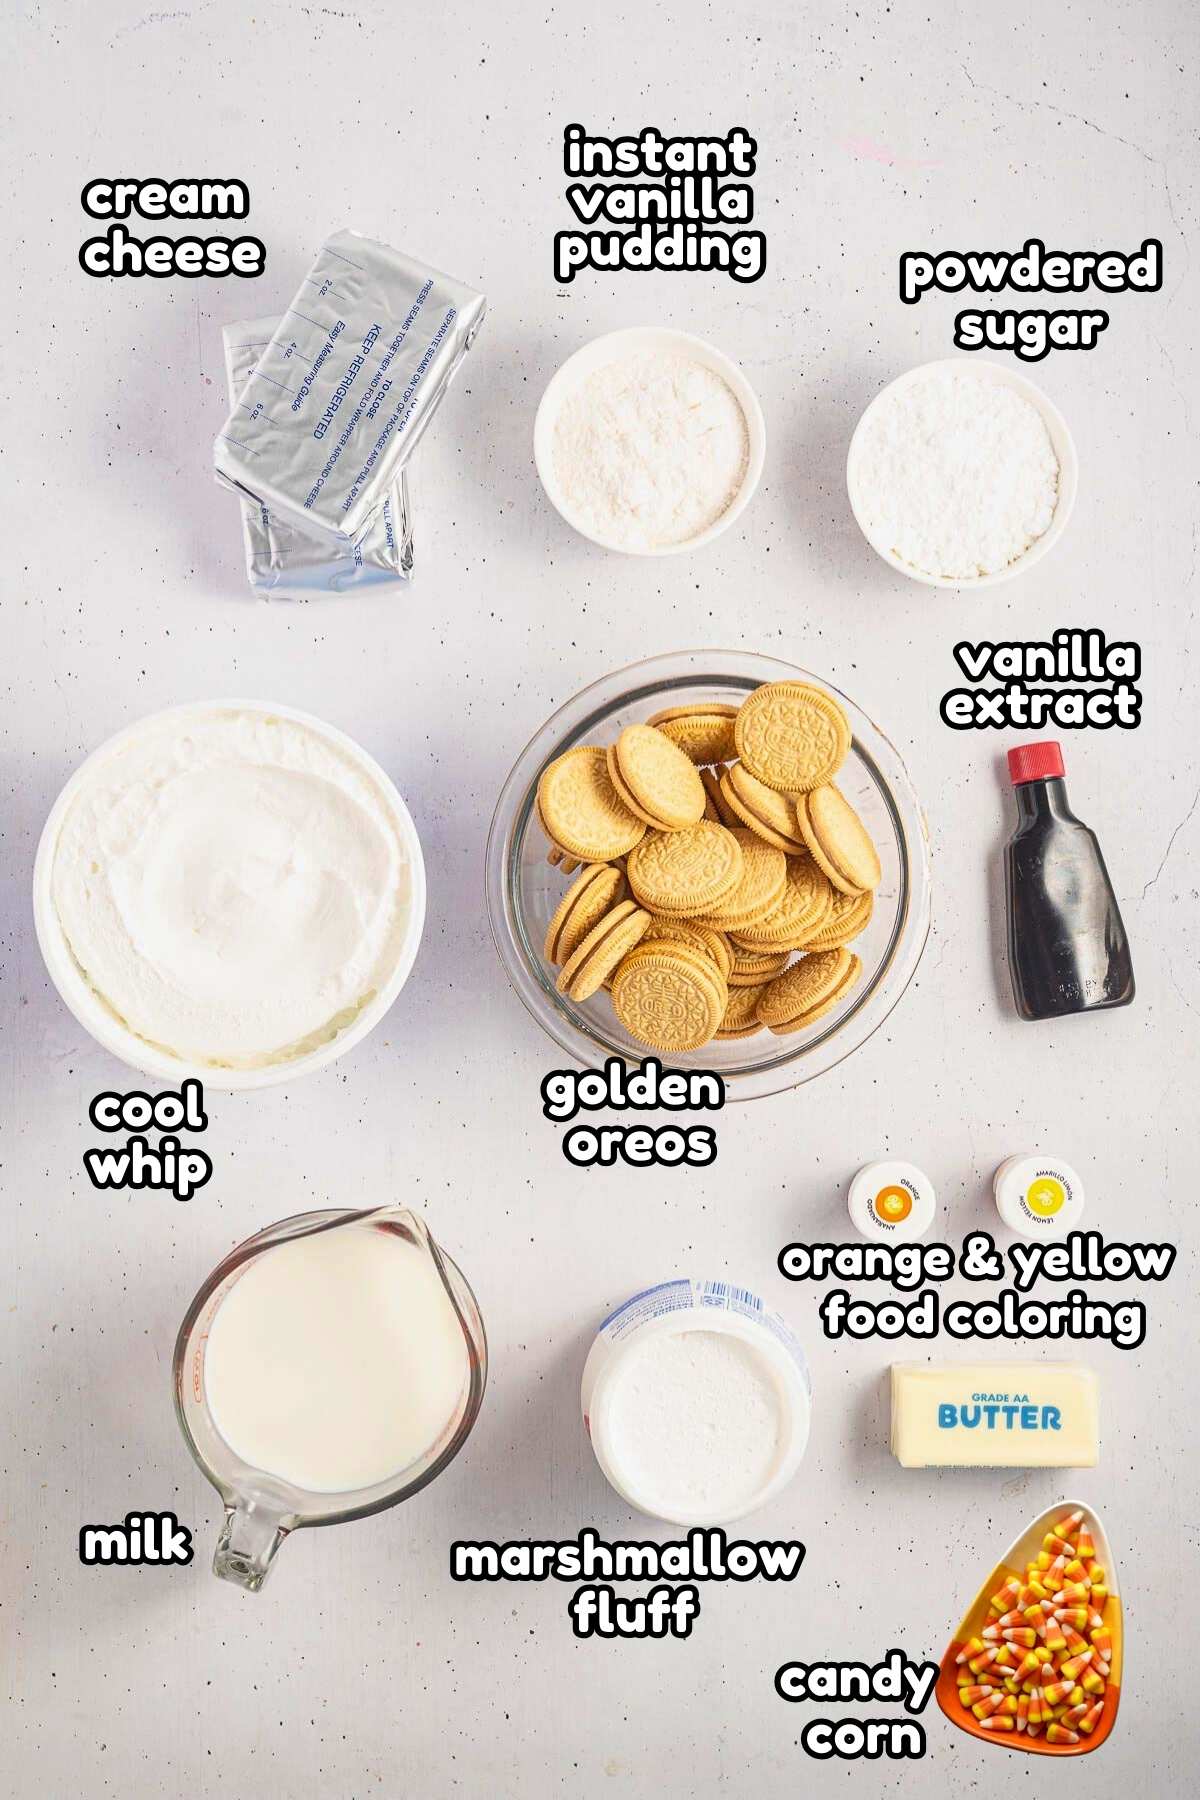
- Golden Oreos: I love using golden Oreos for a sweet and buttery cookie crust! Alternatively, you can use vanilla wafers if you prefer.
- Butter: Melted butter is added to the crushed Oreos to help it meld together and become a crust!
- Cream Cheese: Make sure to use the block of cream cheese for the best results!
- Powdered Sugar: To sweeten up the cheesecake layer without being grainy.
- Marshmallow Creme: Also known as marshmallow fluff! This stuff is seriously good. It adds a fluffy texture to the cheesecake layer.
- Vanilla Extract: For added flavor!
- Yellow & Orange Food Coloring: Gel food coloring is best, as it adds a bright color without adding too much liquid. If you have regular food coloring on hand, you can use that instead!
- Whipped Topping: A frozen whipped topping like Cool Whip is added into the cheesecake layer, as well as layered on top of the candy corn lasagna! Just be sure to thaw it first. Alternatively, you can use 3 cups of homemade whipped cream.
- Vanilla Instant Pudding Mix: Instant pudding makes this layer super easy to whip up.
- Milk: You will need to mix cold milk with the pudding mix for the best flavor. I prefer to use 2% milk for the perfect pudding texture!
- Candy Corn & Sprinkles: To decorate and make this Halloween dessert extra festive, top it off with orange and yellow sprinkles and candy corn!
How To Make The Best Candy Corn Lush Recipe
✱ Be sure to see the recipe card below for exact ingredients and full recipe instructions!
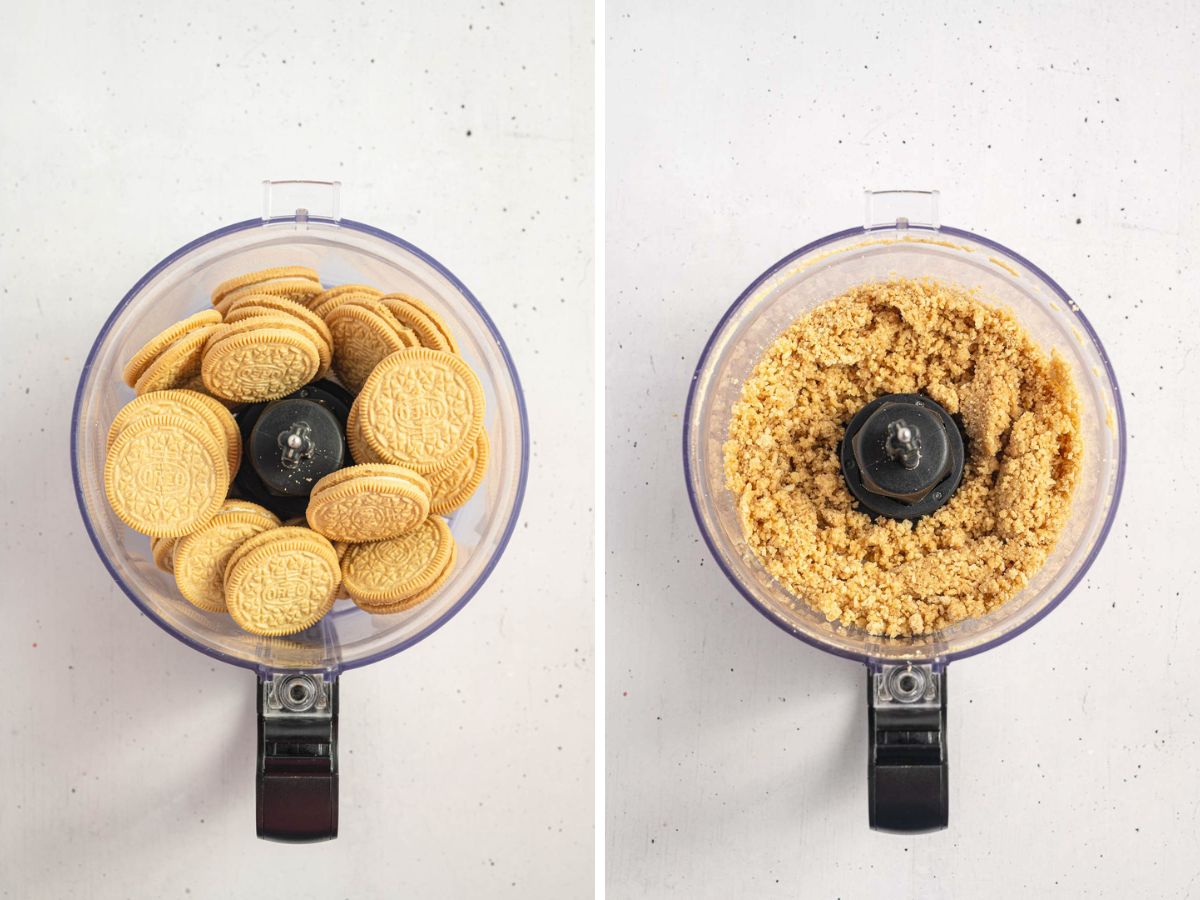
Step 1 | Make the Crust
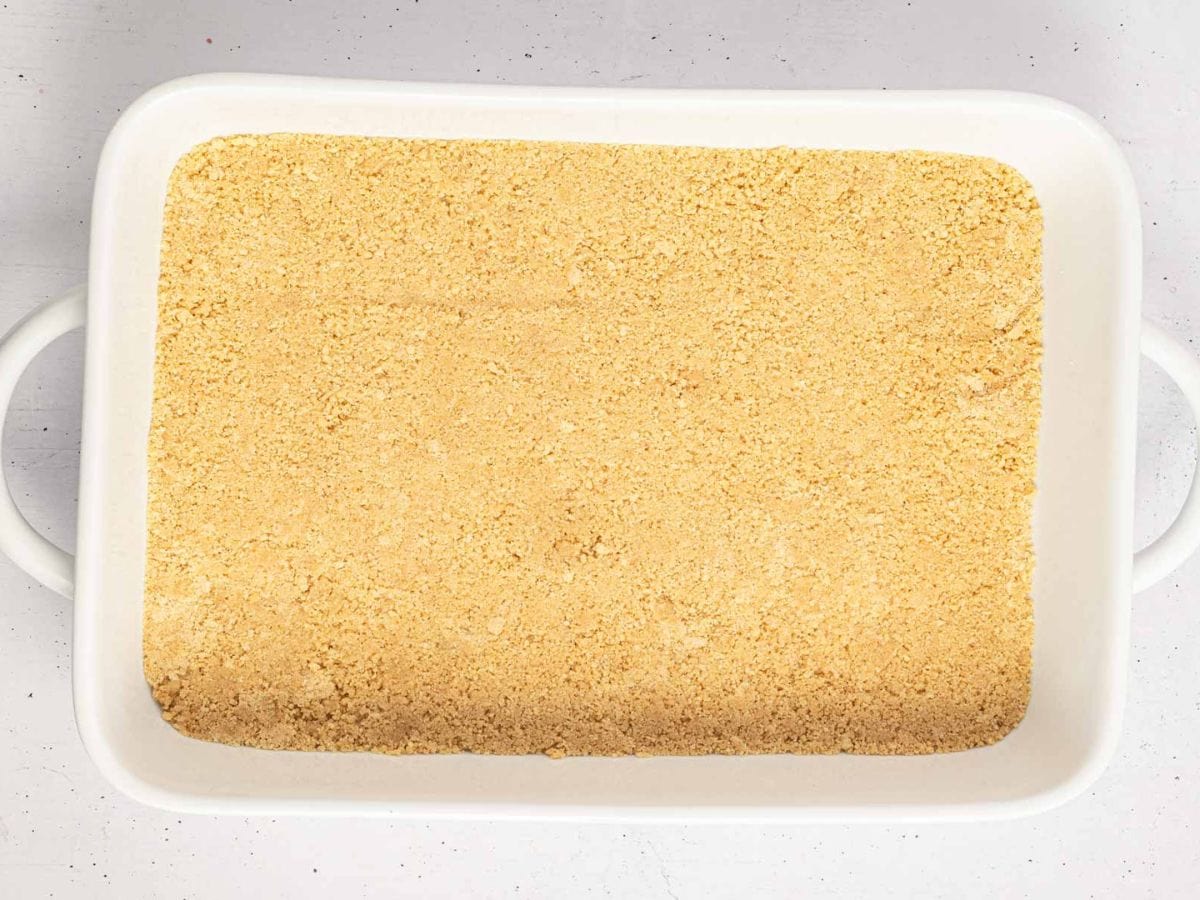
Place the Golden Oreos in a food processor, and process until the cookies have become fine crumbs. Slowly pour in the melted butter while the food processor runs at low speed until the crumbs are coated.
Pour the crumbs into a 9×13 baking dish or pan, and firmly press them evenly into the bottom. Freeze the crust for at least 15 minutes or until it has hardened.
Step 2 | Prep the Yellow No Bake Cheesecake Layer
While the crust is in the freezer, use an electric mixer to combine the cream cheese and powdered sugar in a large bowl until it is smooth.
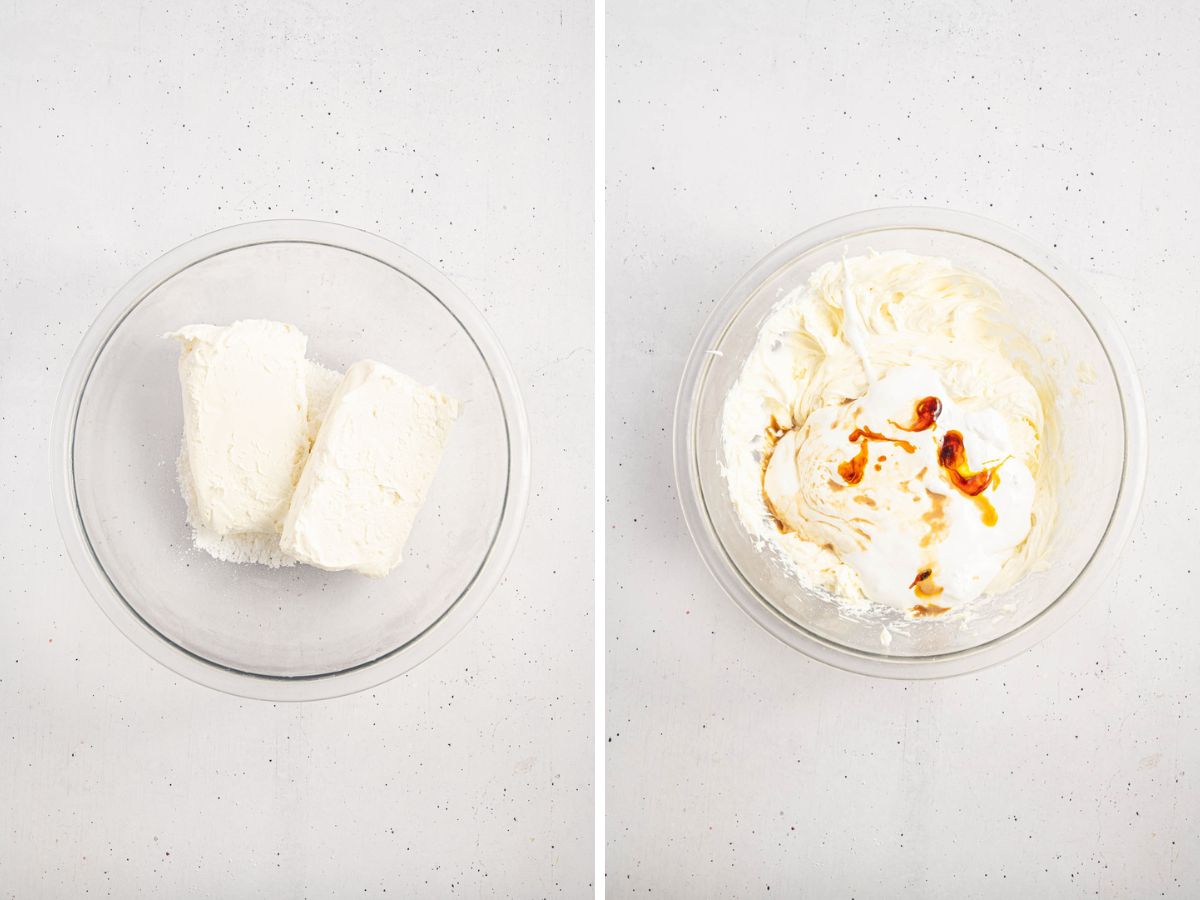
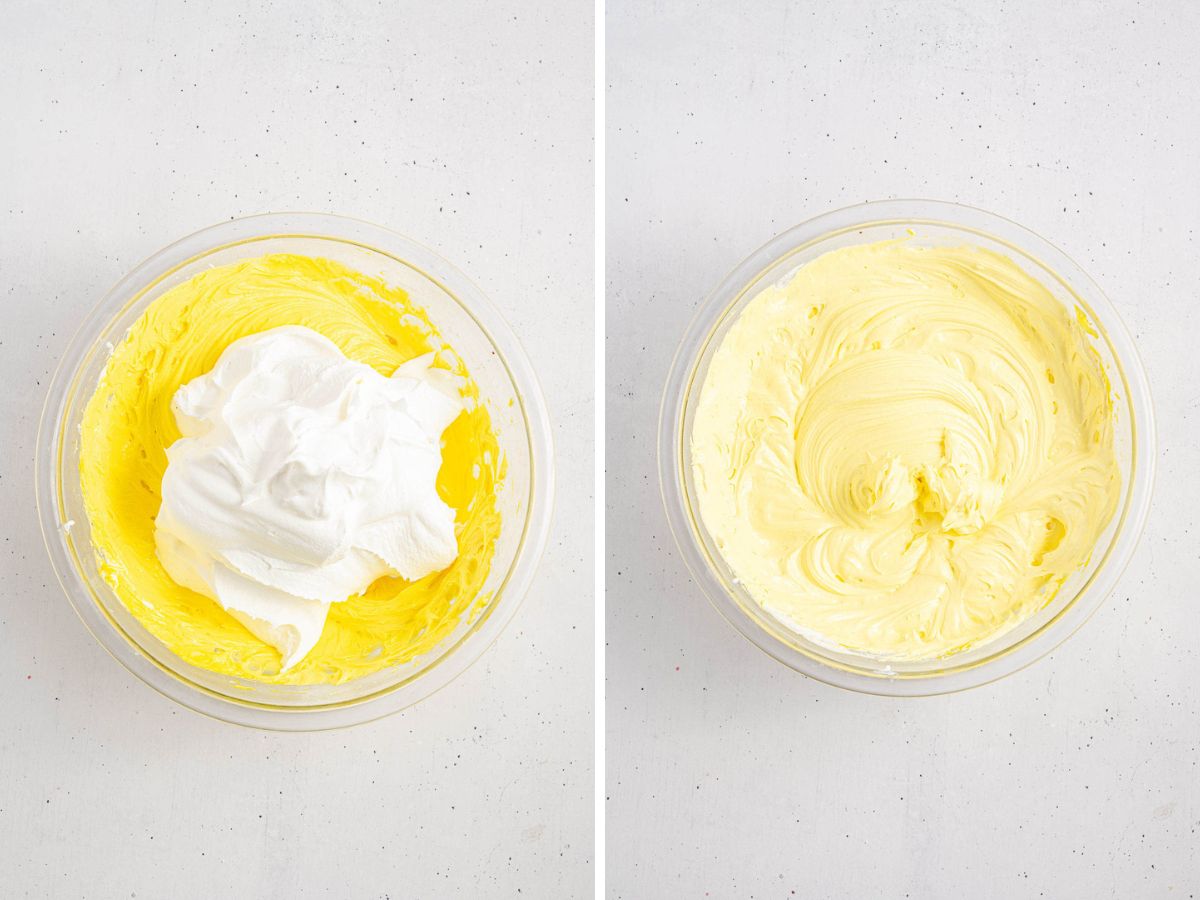
Mix in the marshmallow creme, vanilla extract, and yellow food coloring until it is combined, then fold in half of the whipped topping. Set the mixture aside.
Step 3 | Prep the Orange Pudding Layer
In a separate medium bowl, whisk the vanilla pudding mix, milk, and orange food coloring until it is smooth and starts to get thick. Let the pudding rest on the counter for 4-5 minutes.

Step 4 | Assemble the Candy Corn Lush
Spread the cheesecake layer evenly over the top of the cookie crumb crust.

Then, spoon the pudding over the cheesecake layer and spread it out evenly.

Top off the dessert with the remaining whipped topping and smooth it out.
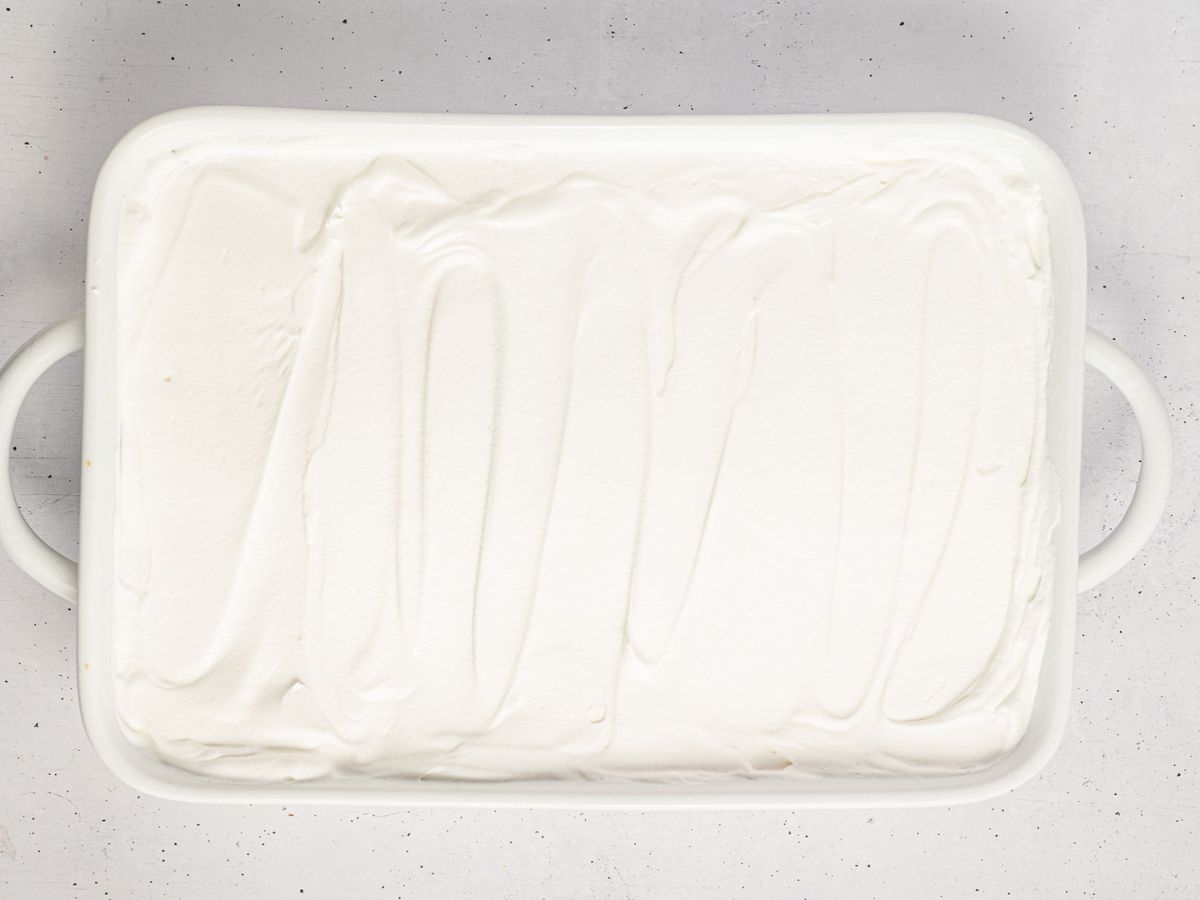
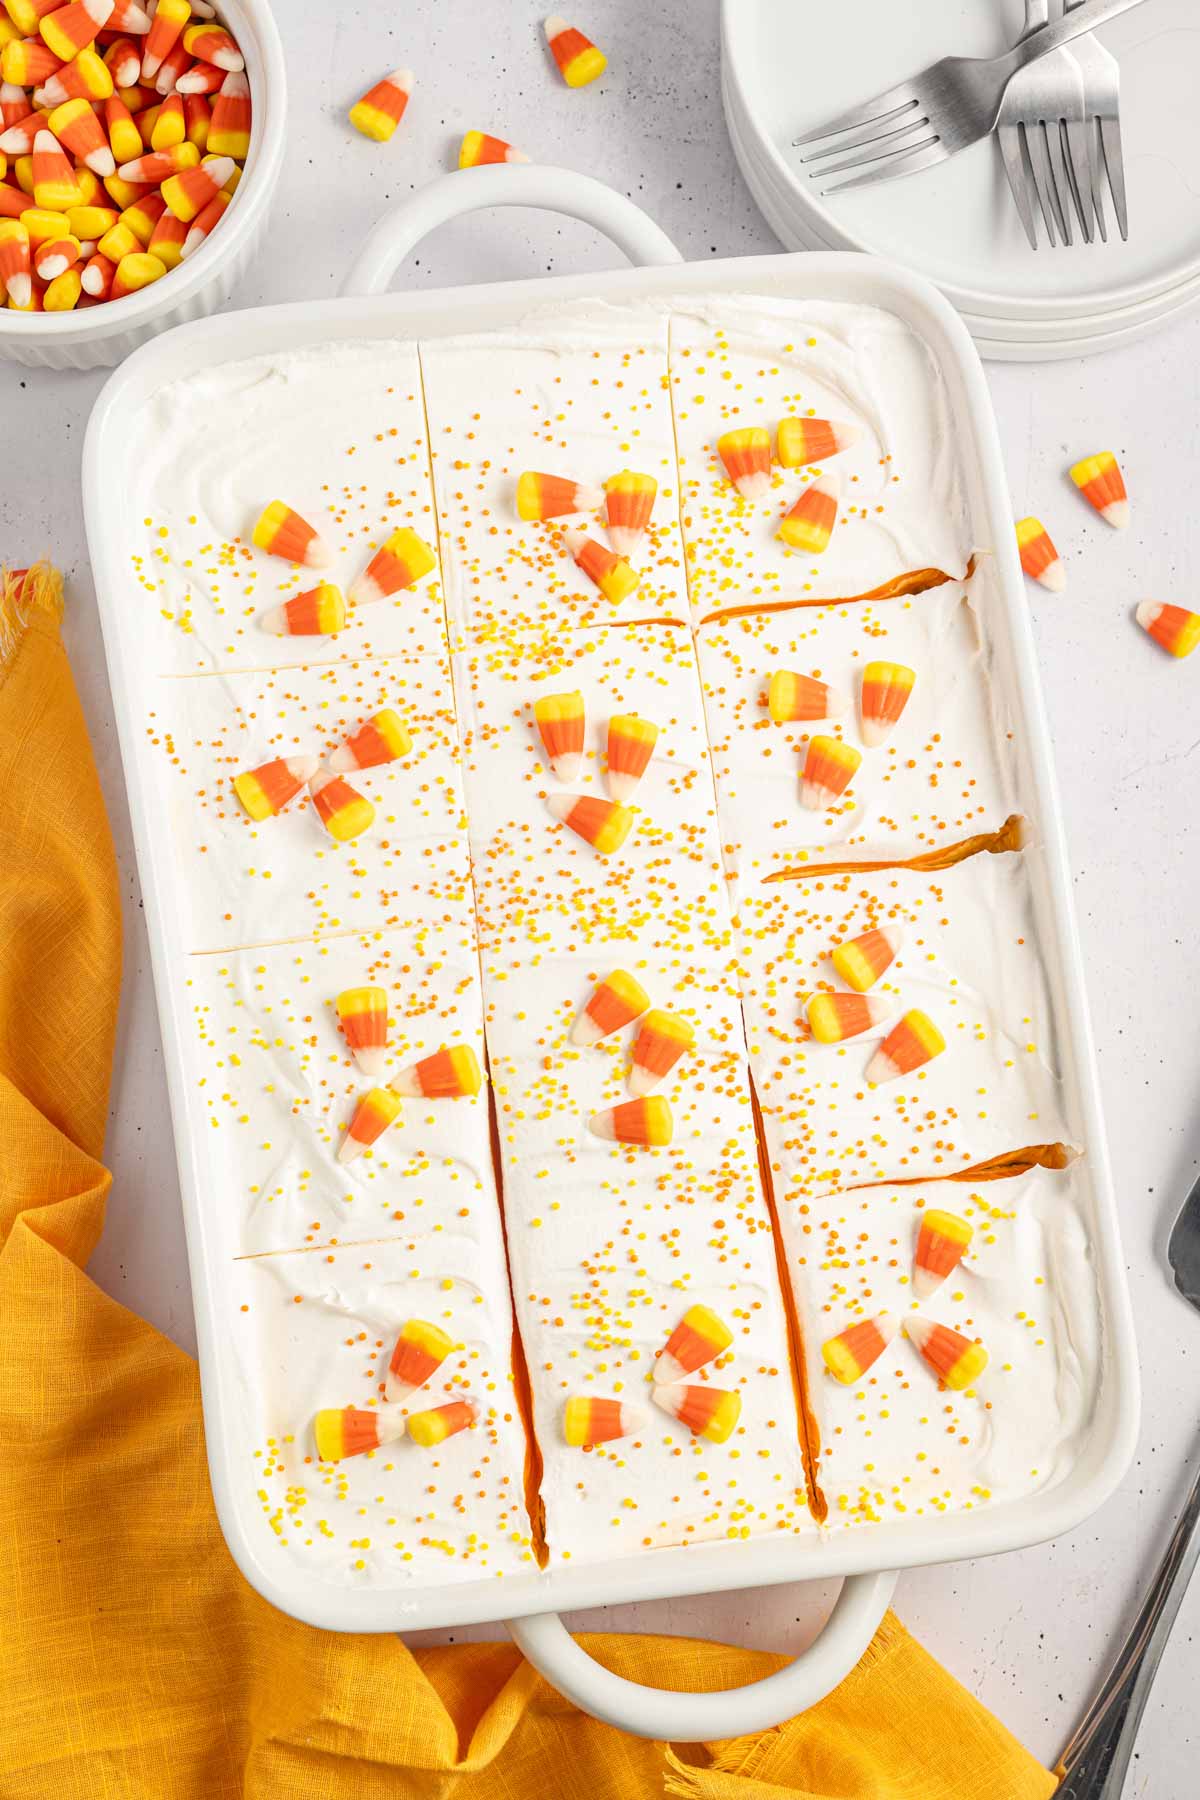
Cover the dessert with plastic wrap, and refrigerate it for at least 4 hours or until the dessert is set. Decorate with candy corn or orange and yellow sprinkles, and serve chilled.
Recipe Tips for No-Bake Desserts
- Don’t skip the chilling time! I know you will want to dive into this dessert right away, but it’s important to allow it to chill for at least 4 hours before serving. This will ensure that it is set enough to slice.
- If you don’t have a food processor, you can smash the Oreos into a crumb-like texture by placing them into a ziplock bag and hitting them with a rolling pin! Just make sure to smash them well. If there are large chunks, the crust might be more fragile.
- To avoid lumps in the cheesecake layer, use room-temperature cream cheese! Plan ahead and let the cream cheese sit at room temperature for a few hours before mixing with additional ingredients.
- Use the flat bottom of a glass or cup to help press the cookie crumbs into the base of the baking pan or dish. The tighter the crumbs are, the more they will stay together when you slice and serve the dessert!
Variations and Substitutions
- Make it gluten-free! To make gluten-free candy corn lush, swap out the Golden Oreos for a gluten-free version or any gluten-free cookies, and be sure your other ingredients are GF certified. I believe Jelly Belly and Brach’s Candy Corn are labeled gluten-free. Just be sure to check your labels.
- Switch up the pudding flavors. For a fun twist, try butterscotch or lemon pudding instead of vanilla! Chocolate pudding would also be delicious. Then, make the cheesecake layer orange for a chocolate candy corn dessert and decorate it with chocolate candy corn.
- If you aren’t a fan of golden Oreos, try replacing them with 3 cups of vanilla wafers for the cookie crumb crust. You’ll want to increase the amount of melted butter to 8 tablespoons since you don’t have the creamy filling from the Oreos anymore! While the golden Oreos keep it light in color, you can also use chocolate Oreos.
Candy Corn Dessert Recipe FAQs
This dessert needs at least 4 hours in the fridge to set properly, but overnight is even better!
Absolutely! It’s perfect for making the day before you plan to serve it. Just keep it covered in the fridge until you’re ready to serve. I recommend decorating it with sprinkles and candy corn just before serving so they don’t run or bleed into the whipped topping!
Make sure to press the cookie crumbs down firmly into the pan and chill the crust for at least 15 minutes before adding the layers. This helps it hold its shape when you slice it.
Storage Instructions for No-Bake Desserts
Storage: Cover with foil or plastic wrap or place in an airtight container and store in the refrigerator for 3 days.
Freeze: You can freeze the candy corn dessert by wrapping it in plastic wrap and foil, and placing it in the freezer for up to 2 months. Thaw it overnight in the refrigerator before serving. Be aware that the whipped topping may start to break down during the thawing process.
What to Serve with Halloween Desserts
Pair this sweet treat with other Halloween dessert ideas for a festive party or get together! Some of my favorites are my Halloween chex mix or my chocolate covered pretzel pumpkins! And don’t forget to serve it with some Halloween sangria for the adults!
Halloween Dessert Recipes Ideas
- Mummy Rice Crispy Treats
- Caramel Apple Dump Cake
- Halloween Monster Munch Popcorn Snack
- No-Bake Orange Creamsicle Bars (change up the coloring of the layers for Halloween – I always add green to the cheesecake layer and purple to the whipped cream)
- Halloween Brownies
- Gummy Worm Dirt Cupcakes
- Oreo Mummy Cookies
Hungry for more easy, home-cooked, delicious recipes?
Sign up for my free recipe club to get family-friendly recipes in your inbox each week! Find me sharing daily meal-time inspiration on Pinterest, Facebook, and Instagram.
No-Bake Candy Corn Lush
Click Stars To Rate
Equipment
Ingredients
- 25 whole Golden Oreos
- 6 tbsp butter - melted
- 2 8 oz packages of cream cheese - softened
- ½ cup powdered sugar
- 1 7 oz jar of marshmallow creme
- 1 tsp vanilla extract
- ½ tsp yellow gel food coloring
- 16 oz whipped topping - thawed and divided
- 2 3 oz boxes of vanilla instant pudding mix
- 3 cups milk - cold, see notes
- ½ tsp orange gel food coloring
- 36 pieces of candy corn - optional for decorating
- 2 tbsp orange and yellow sprinkles - optional for decorating
Instructions
- Place the Golden Oreos in a food processor, and process until the cookies have become fine crumbs. Slowly pour in the melted butter while the food processor runs at low speed until the crumbs are coated. (This can also be done by hand by placing cookies in a zip bag and crushing with a rolling pin, then mix in butter and stir until combined)
- Pour the crumbs into a 9×13 baking dish or pan, and firmly press them evenly into the bottom. Freeze the crust for at least 15 minutes or until it has hardened.
- While the crust is in the freezer, use an electric mixer to combine the cream cheese and powdered sugar in a large bowl until it is smooth. Mix in the marshmallow creme, vanilla extract, and yellow food coloring until it is combined, then fold in half of the whipped topping. Set the mixture aside.
- In a separate medium bowl, whisk the vanilla pudding mix, milk, and orange food coloring until it is smooth and starts to get thick. Let the pudding rest on the counter for 4-5 minutes.
- To assemble, spread the cheesecake layer evenly over the top of the cookie crumb crust. Then, spoon the pudding over the cheesecake layer and spread it out evenly. Top off the dessert with the remaining whipped topping and smooth it out. Cover the dessert with plastic wrap, and refrigerate it for at least 4 hours or until the dessert is set.
- Decorate with candy corn or orange and yellow sprinkles, and serve chilled.
Notes
-
- Don’t skip the chilling time! I know you will want to dive into this dessert right away, but it’s important to allow it to chill for at least 4 hours before serving. This will ensure that it is set enough to slice.
- If you don’t have a food processor, you can smash the Oreos into a crumb-like texture by placing them into a ziplock bag and hitting them with a rolling pin! Just make sure to smash them well. If there are large chunks, the crust might be more fragile.
- To avoid lumps in the cheesecake layer, use room-temperature cream cheese! Plan ahead and let the cream cheese come to room temperature before mixing with additional ingredients.
- Use the flat bottom of a glass or cup to help press the cookie crumbs into the base of the baking pan or dish. The tighter the crumbs are, the more they will stay together when you slice and serve the dessert!
Want to Save this Recipe?
By submitting this form, you consent to receive emails from Soulfully Made.