This post may contain affiliate links. Please read our disclosure policy.
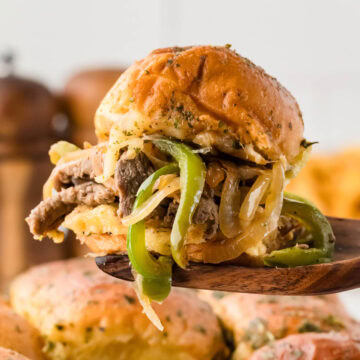
Got a hungry crowd or family to feed? These Philly Cheesesteak Sliders are the perfect solution. In just 15 minutes of prep, you can turn a few simple ingredients into sliders bursting with tender beef, melty cheese, and savory sautéed peppers & onions.
Perfect for game day gatherings or quick weeknight dinners, these sliders bring all the flavor of a classic Philly cheesesteak into easy-to-eat, crowd-pleasing bites! I know my bunch cheers for this one every time!
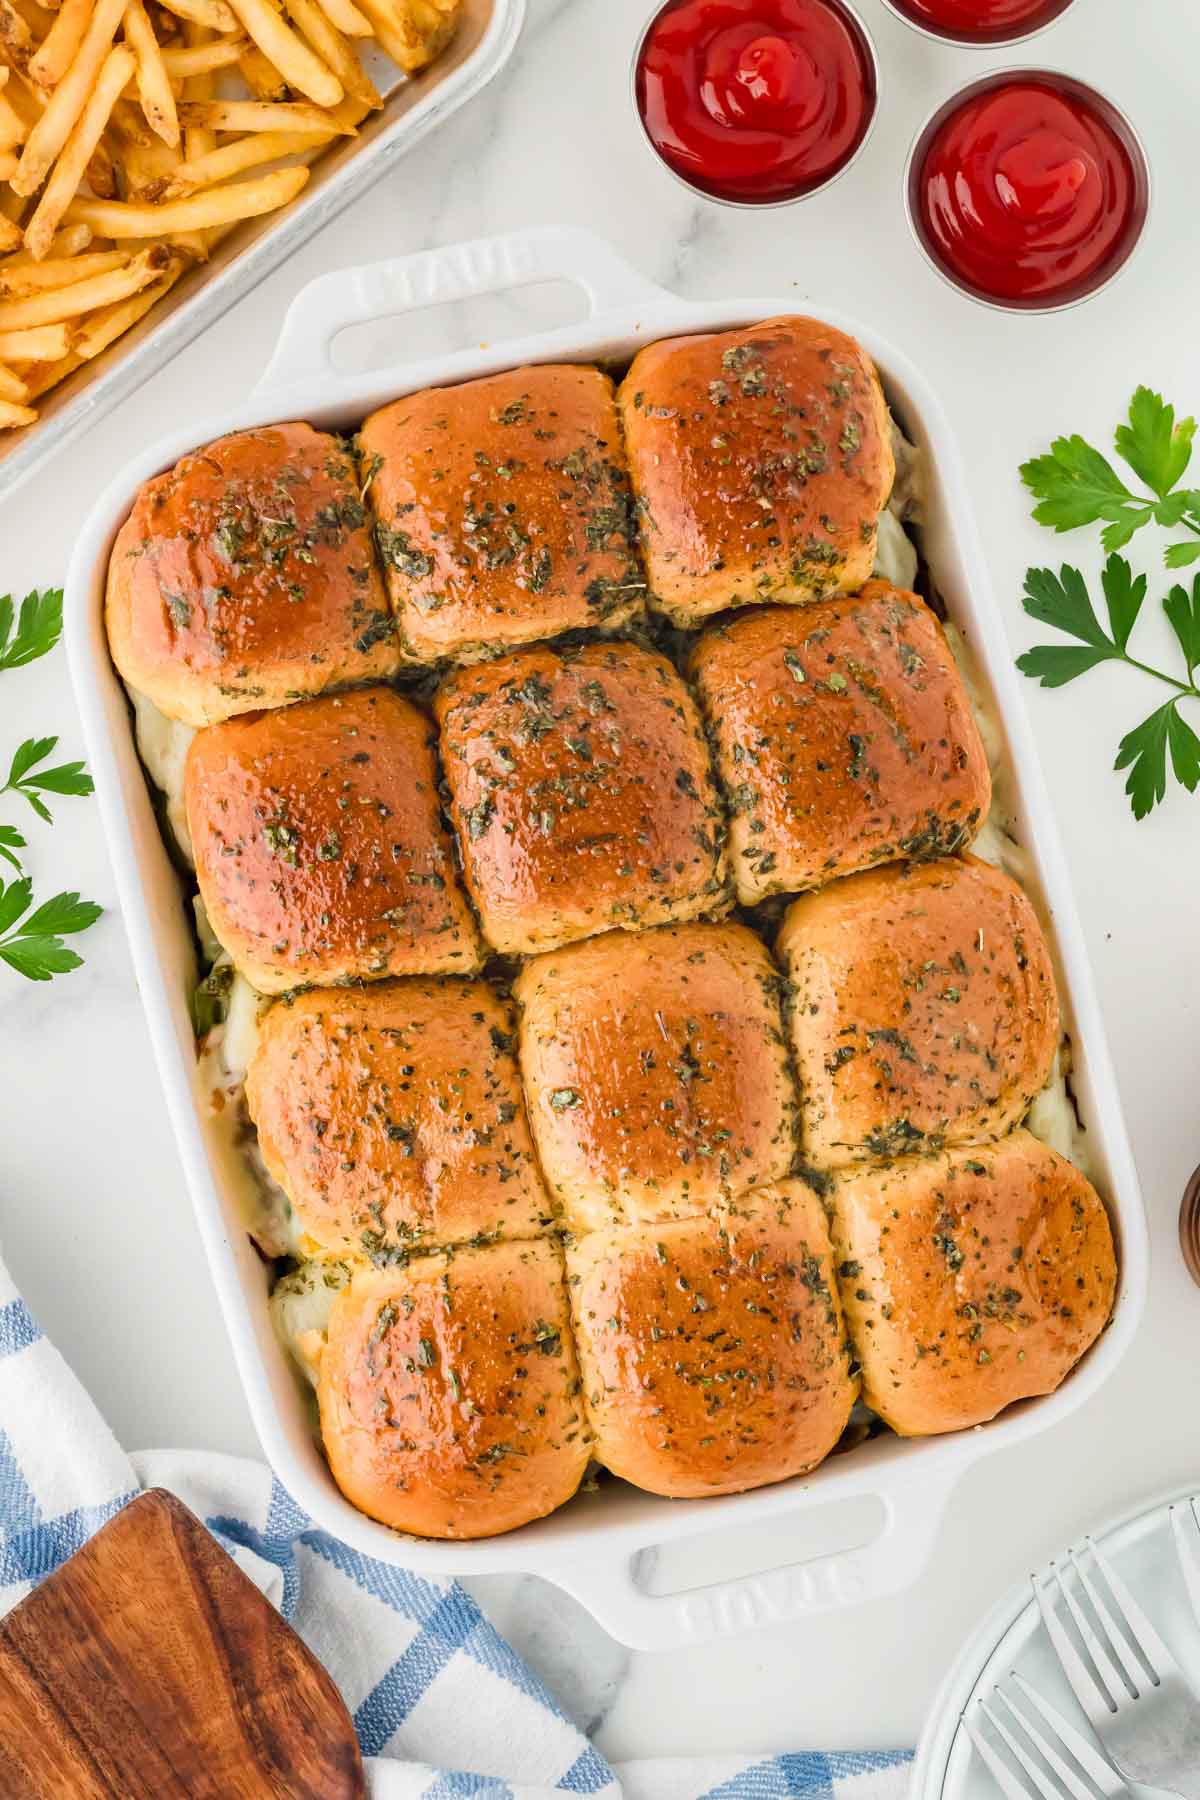
Easy Philly Cheesesteak Sliders with Hawaiian Rolls
These Philly Cheesesteak Sliders have become a staple in my kitchen for a reason—I love recipes that make life easier without sacrificing flavor. As a busy mom, I know how hectic weeknights can get, and I’m always on the lookout for meals that don’t require a lot of time but still deliver that satisfying, homemade goodness. Whether it’s a last-minute game day snack or a weeknight dinner when I don’t have much time to spare, these sliders hit the mark every single time.
What I really appreciate about this recipe is how adaptable it is. You can whip them up with just a few simple ingredients, and you probably have most of them on hand already. The tender beef, gooey cheese, and perfectly seasoned onions come together in a way that feels indulgent but isn’t a chore to prepare. Plus, I can always count on hearing, “Can we have this again?” after serving them—my crowd cheers for these sliders every time!
They’re proof that you don’t need to spend hours in the kitchen to create something that makes everyone happy.
Ingredient Notes
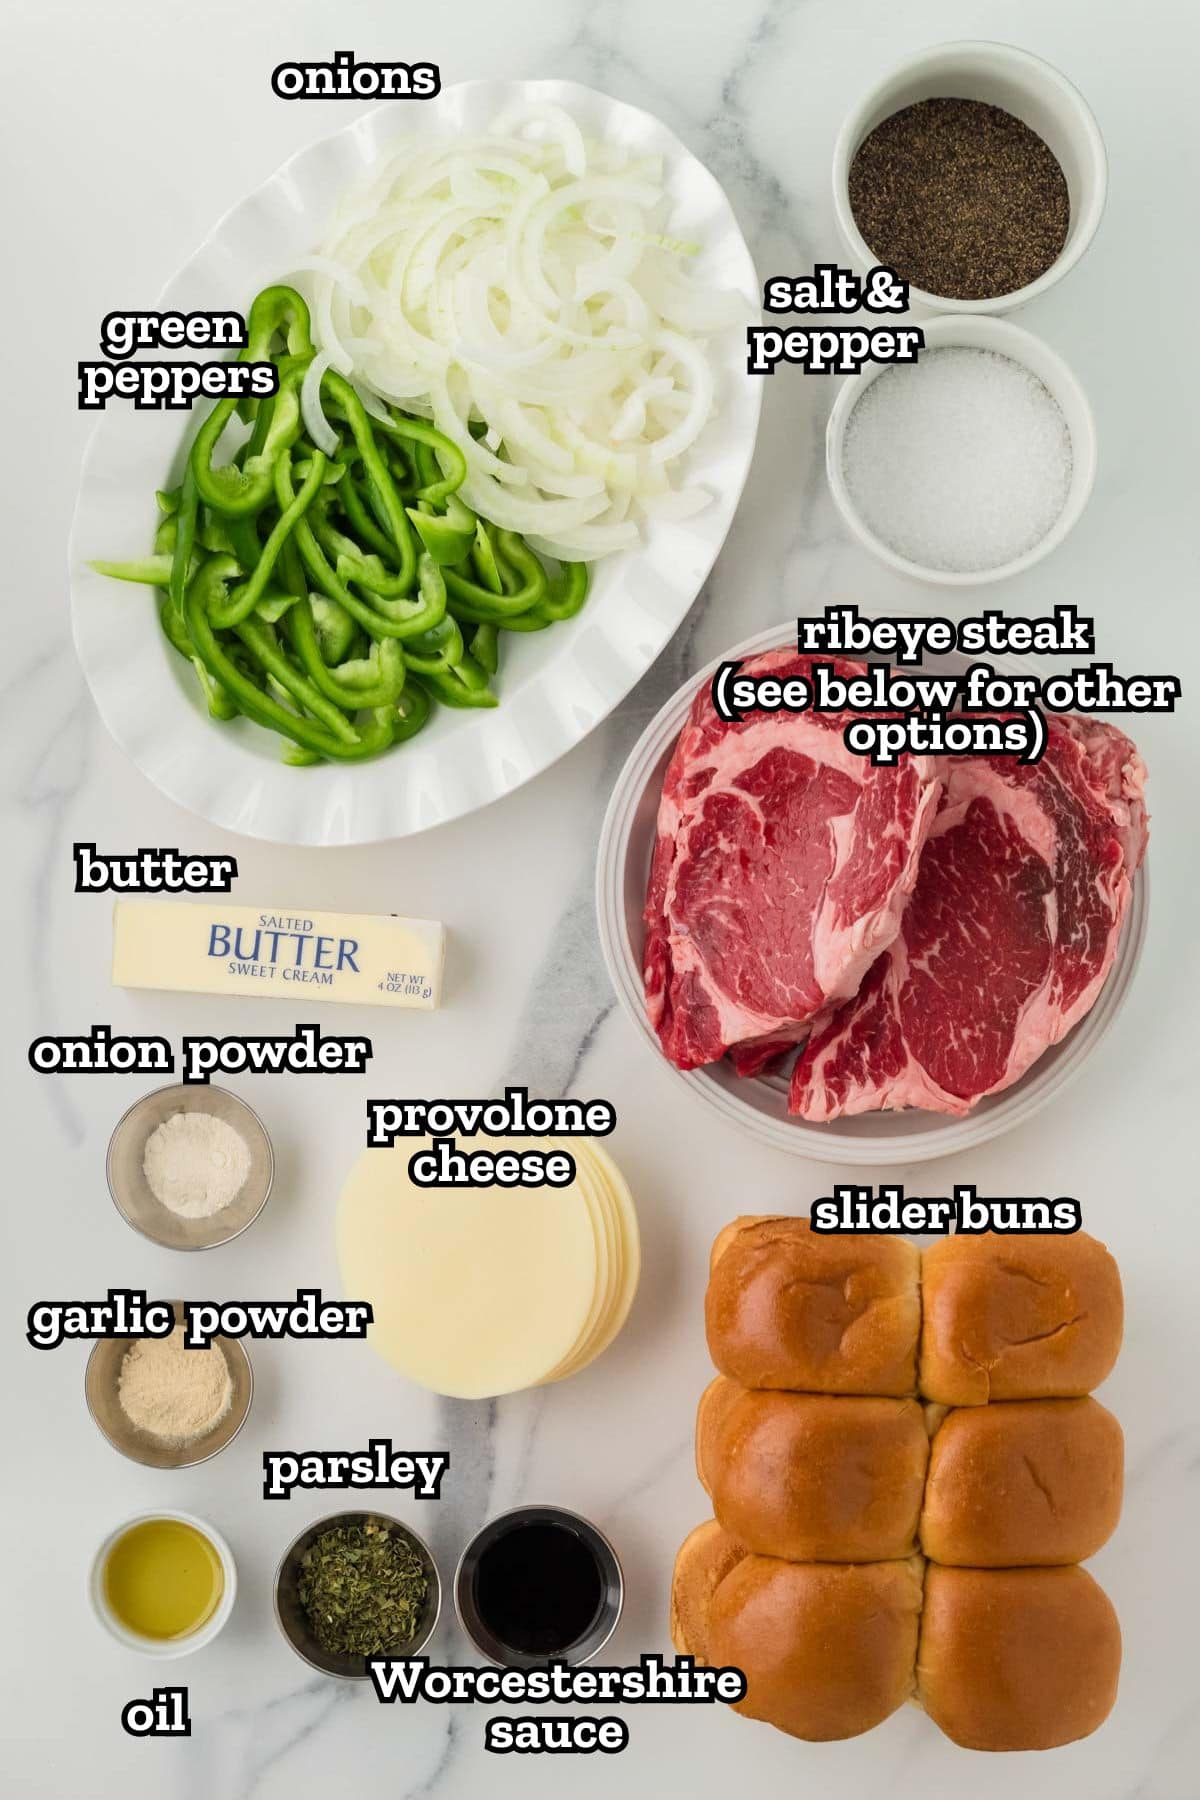
Variations and Substitutions
- Not a Worcestershire Sauce Fan? I recommend a pat of butter and your favorite steak seasoning. My favorite is Kinders Cowboy Butter (omit the salt). You can grab it on my Amazon link or I also find it at Sam’s Club or some grocery stores have it! We use this all the time for grilling and seasoning our meats.
- Add Mushrooms: Sautéed mushrooms add an earthy flavor and extra heartiness to the sliders. They are another favorite on cheesesteak sandwiches.
- Meat Alternatives: For a Philly Chicken Cheesesteak version, you can use thinly sliced chicken breast instead of ribeye.
- Philly Cheesesteak Sliders Ground Beef: As a more budget-friendly option, you can certainly use ground beef. Although nowadays, you can pick up that shaved beef at about the same price as ground beef.
- Cheese Options: Swap the provolone for cheddar, mozzarella, or pepper jack for a different flavor profile. If you love a little spice, try adding some sliced jalapeños with pepper jack cheese for a new take on the classic.
- Seasonings: Feel free to use fresh garlic in place of garlic powder! I say you can never have too much garlic.
How To Make the Best Philly Cheesesteak Sliders
✱ Be sure to see the recipe card below for exact ingredients and full recipe instructions!
- Preheat your oven to 350°F.
- Prep the ingredients: Thinly slice the bell pepper, onion, and steak.
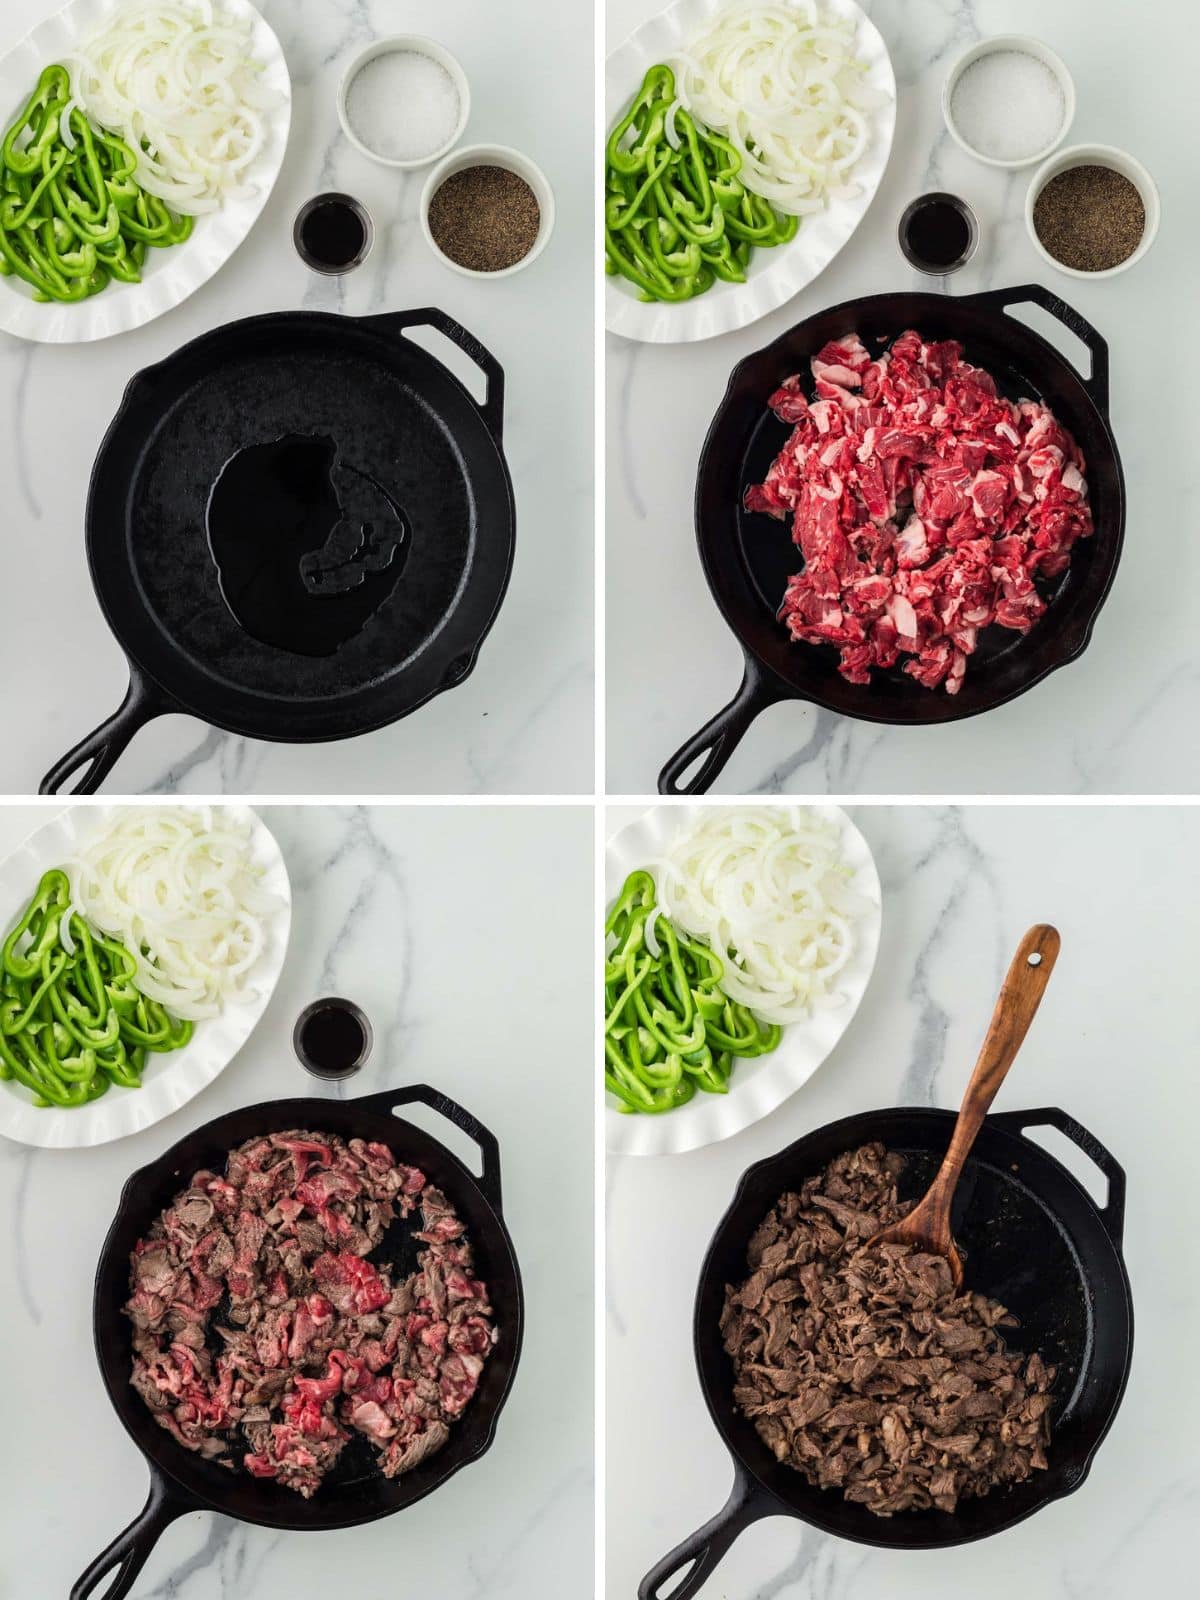
- Cook the steak: Heat olive oil in a large skillet (I love my cast-iron skillet) over medium-high heat. Add the sliced steak, season with salt, pepper, and Worcestershire sauce, and cook until it’s browned and cooked through. Once done, transfer the steak to a bowl.
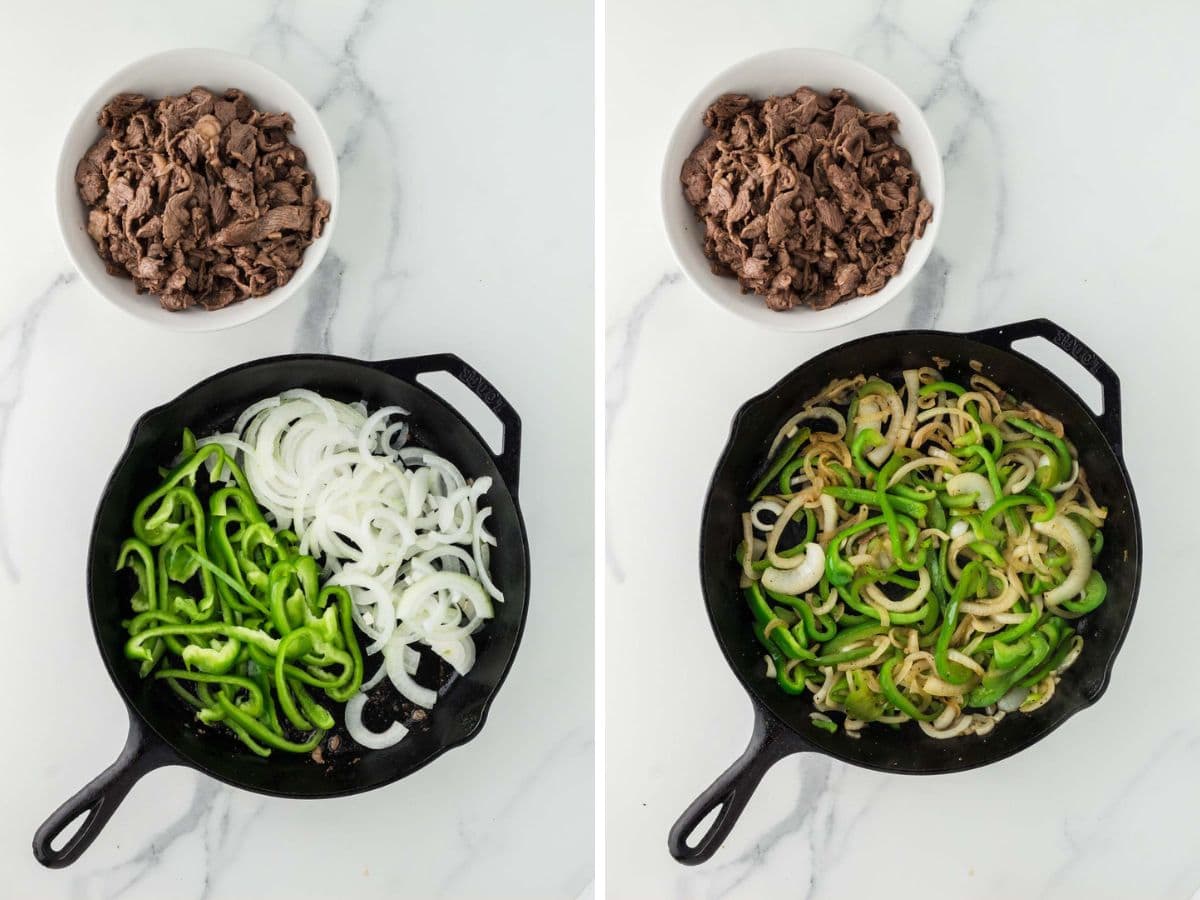
If you use shaved steak watch it closely as it cooks super quick! - Sauté the veggies: In the same skillet, add the sliced bell pepper and onion. Season with a bit more salt and pepper, and sauté until they’re soft and tender. This takes a couple of minutes, but cook them until you get the caramelization you like. Then, take the skillet off the heat.
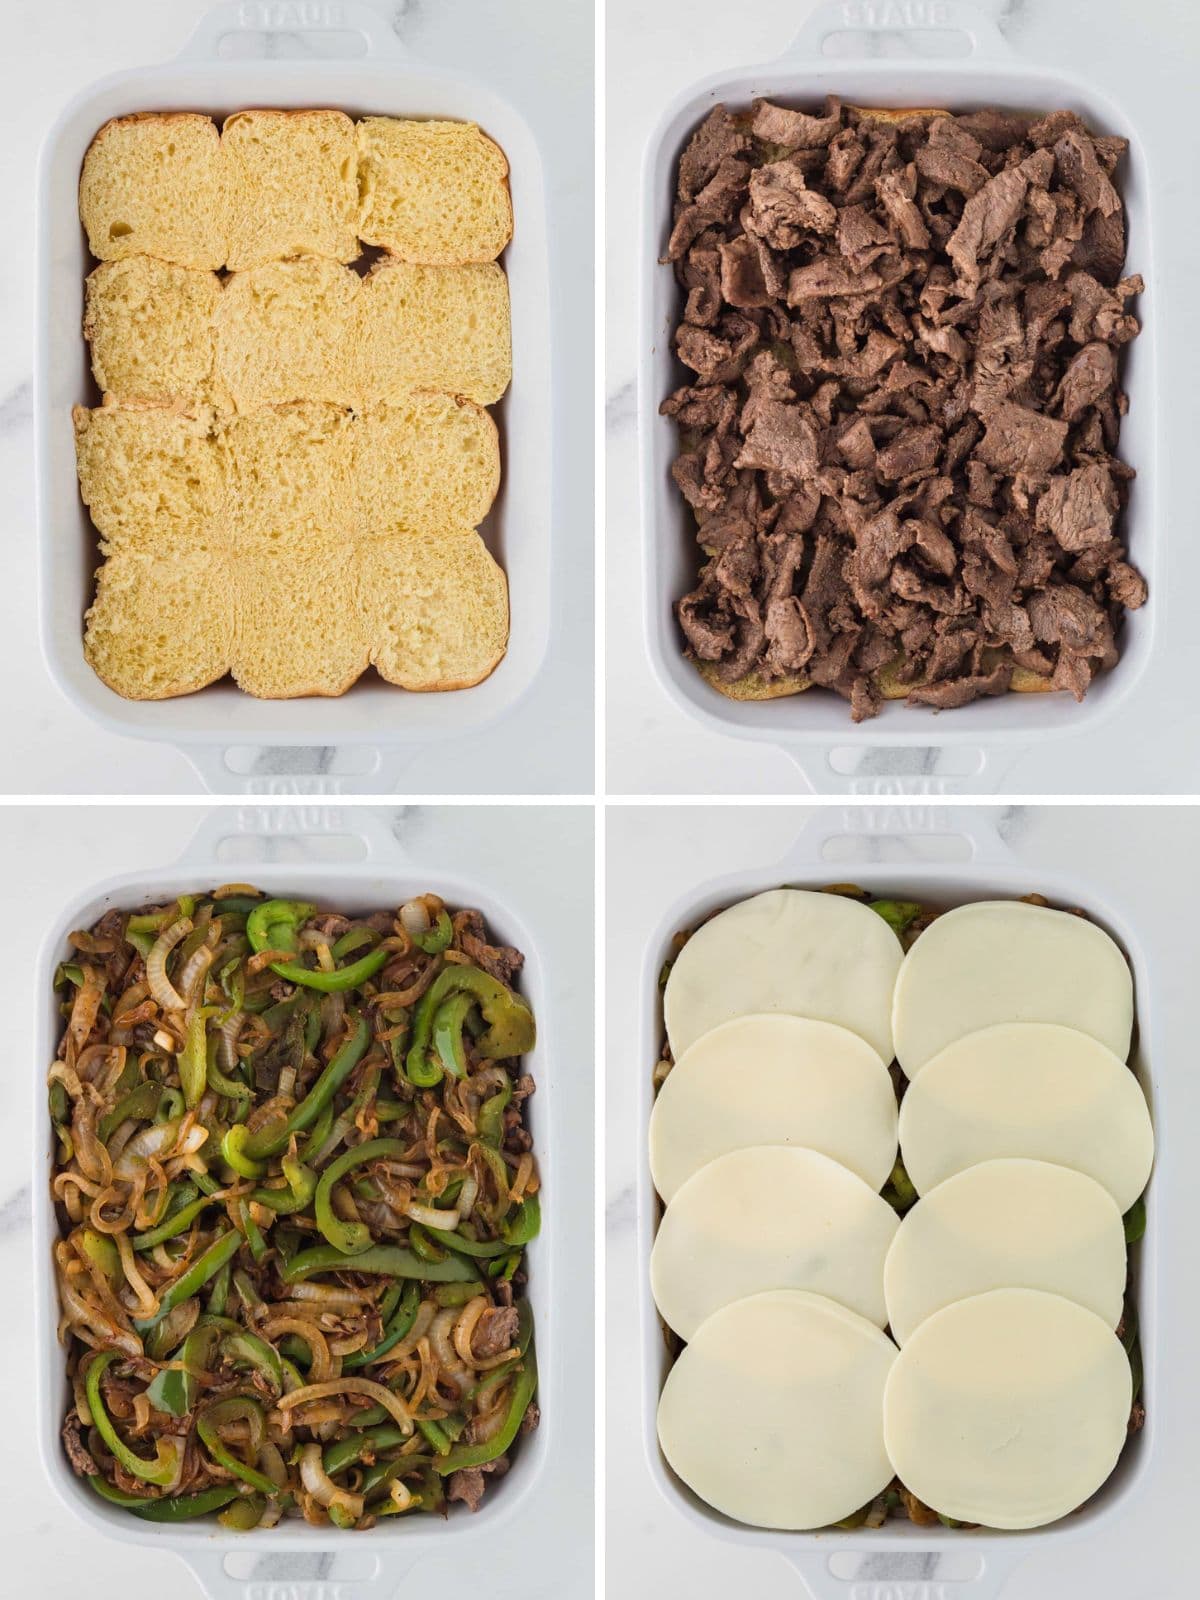
If you have enough room in your pan, you can cook the veggies and steak together. And it doesn’t matter what order you cook them in. If you want to do the veggies first, that works just as well. - Assemble the sliders: Slice the Hawaiian slider rolls in half horizontally while keeping the buns intact.
Place the bottom halves of the slider buns in a greased baking dish.
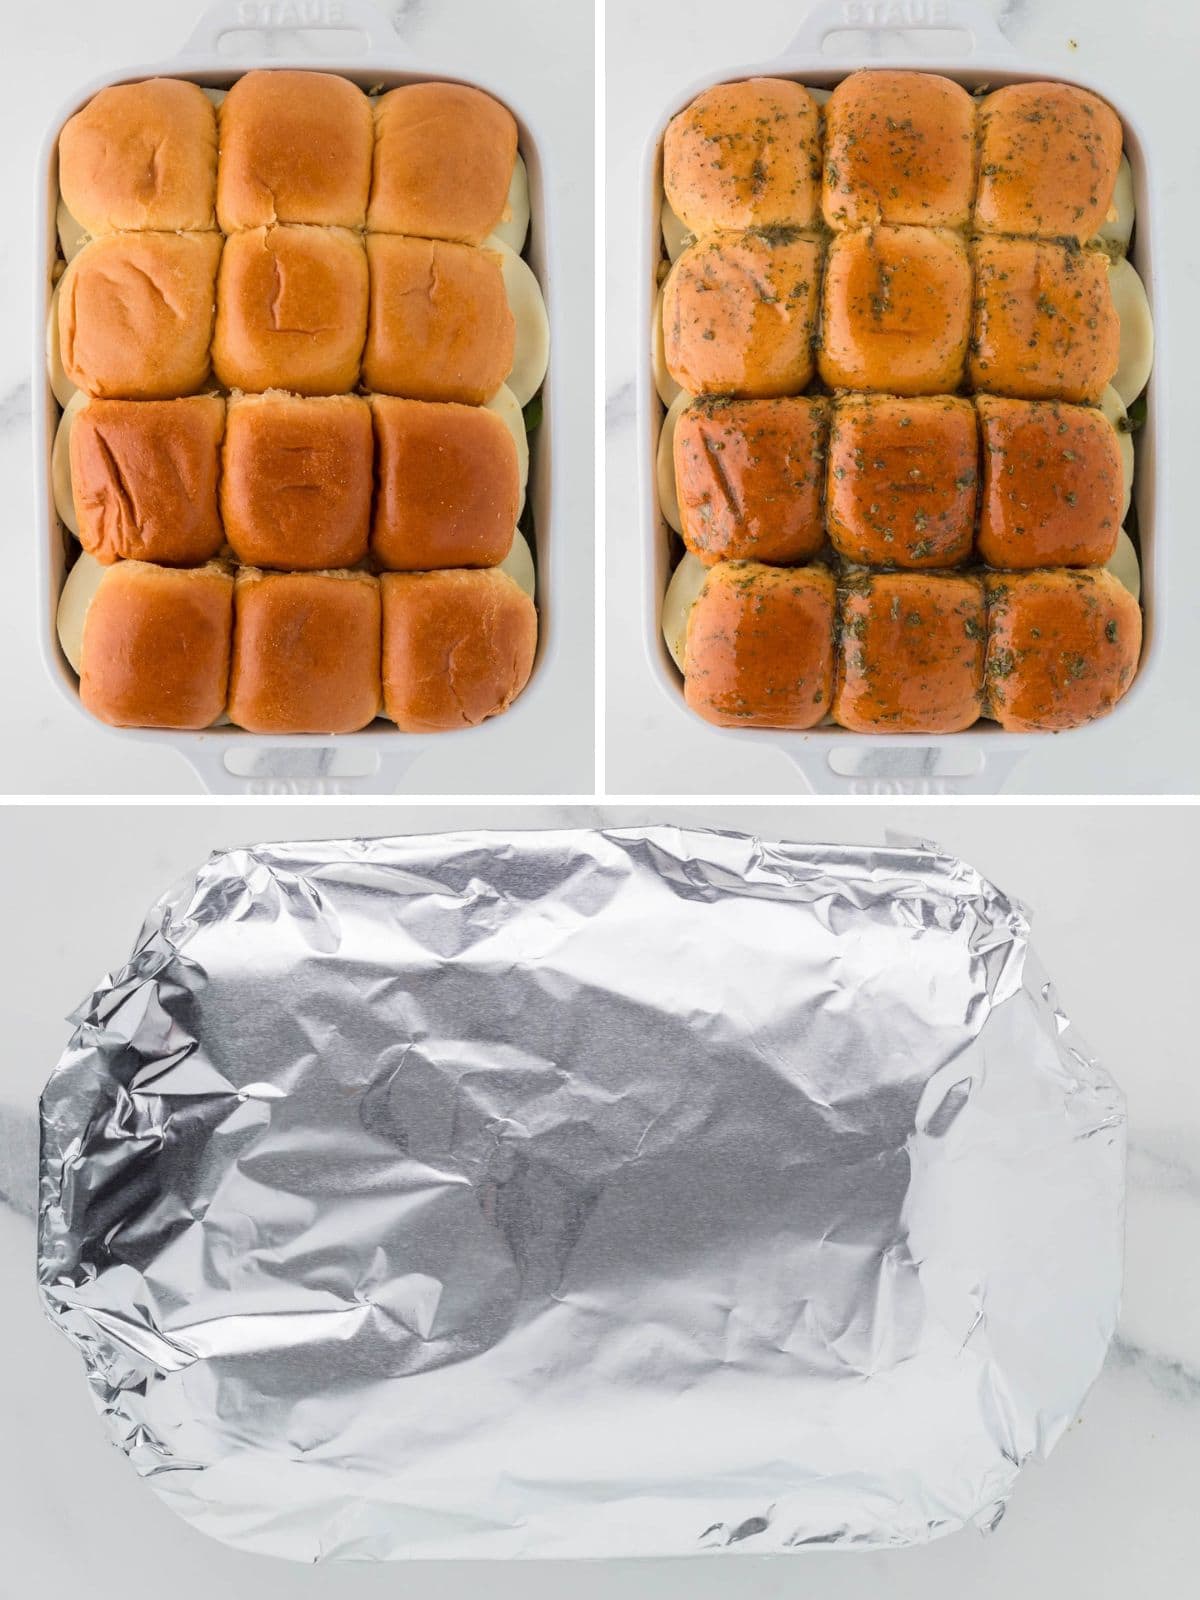
Layer the cooked steak evenly over the buns, followed by the sautéed onions and peppers. Lay slices of provolone cheese on top, and then add the top halves of the buns. - Make the buttery topping: Melt the butter and stir in the onion powder, garlic powder, and parsley. Brush this mixture over the tops of the buns, then cover the dish with foil.
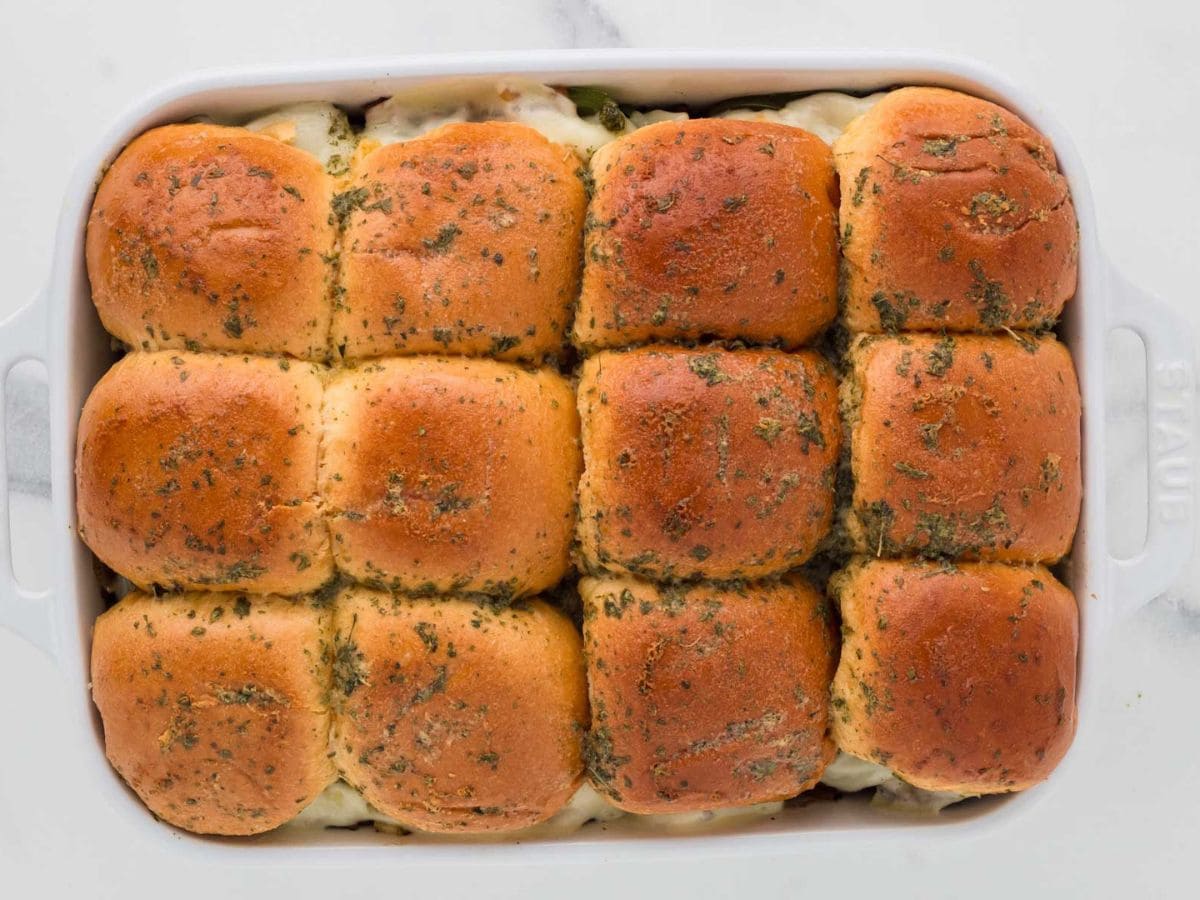
- Bake: Pop the sliders in the oven and bake for 15 minutes. After that, remove the foil and bake for another 5 to 10 minutes, or until the tops are golden brown and the cheese is gooey and delicious.
- Serve: Once they’re out of the oven, serve the sliders immediately while they’re warm and gooey. Enjoy
How to Shave Steak for Philly Cheesesteaks
I often opt for shaved steak, which can be found in the grocery store’s meat section. I find it in various stores so it’s easy to grab and keep on hand in the freezer for speedy dinners!
But if you don’t have it or want to use up your steak, here are some tips to successfully get super thinly sliced or shaved steak.
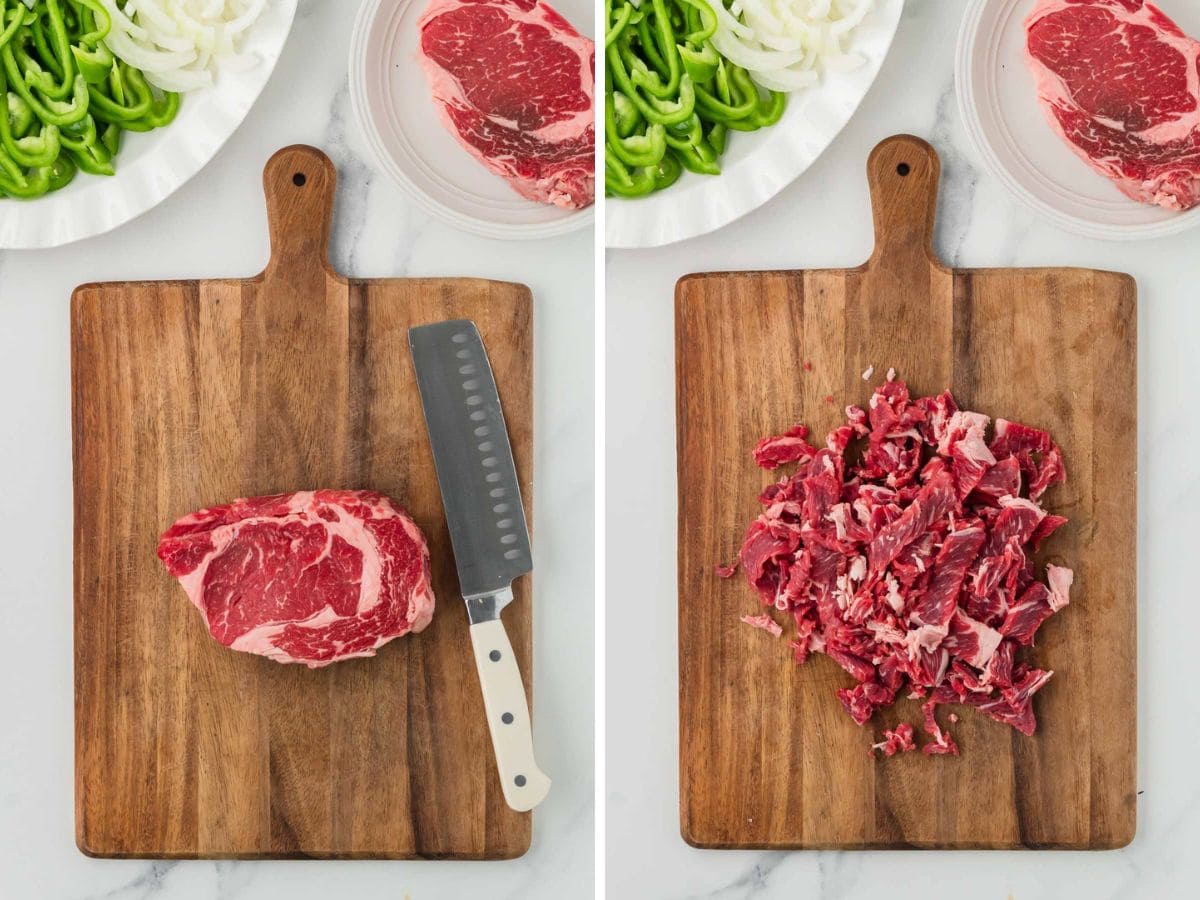
- Before slicing your ribeyes, place the steaks in the freezer for about 30 minutes to firm them up and make slicing easier. Flank or skirt steaks can also be used.
- Slice against the grain of the steaks, creating thin ribbon-like strips of meat. Slicing against the grain helps to break down the muscle fibers, resulting in more tender and easier-to-chew meat.
- Ask the butcher, they are usually willing to shave any cut of beef you would like to use.
Want to Save this Recipe?
By submitting this form, you consent to receive emails from Soulfully Made.
Recipe FAQs
What size baking dish did you use?
I used my smallest Staub baking dish, which is 7.5 x 6”. It fits 12 sliders perfectly. You can also use a 9×13” baking sheet or any size they will fit in.
Do I have to use ribeye steak?
You can use whatever cut of steak you like best. For a more cost-effective option, you can use a chuck roast, and slice it or use it shredded. For a quick and easy alternative, you could use sliced roast beef. This is a great dish to use up leftover steak or roast.
You sure can. I recommend spreading 1/3 cup or so on the bottom of the rolls before layering on the steak.
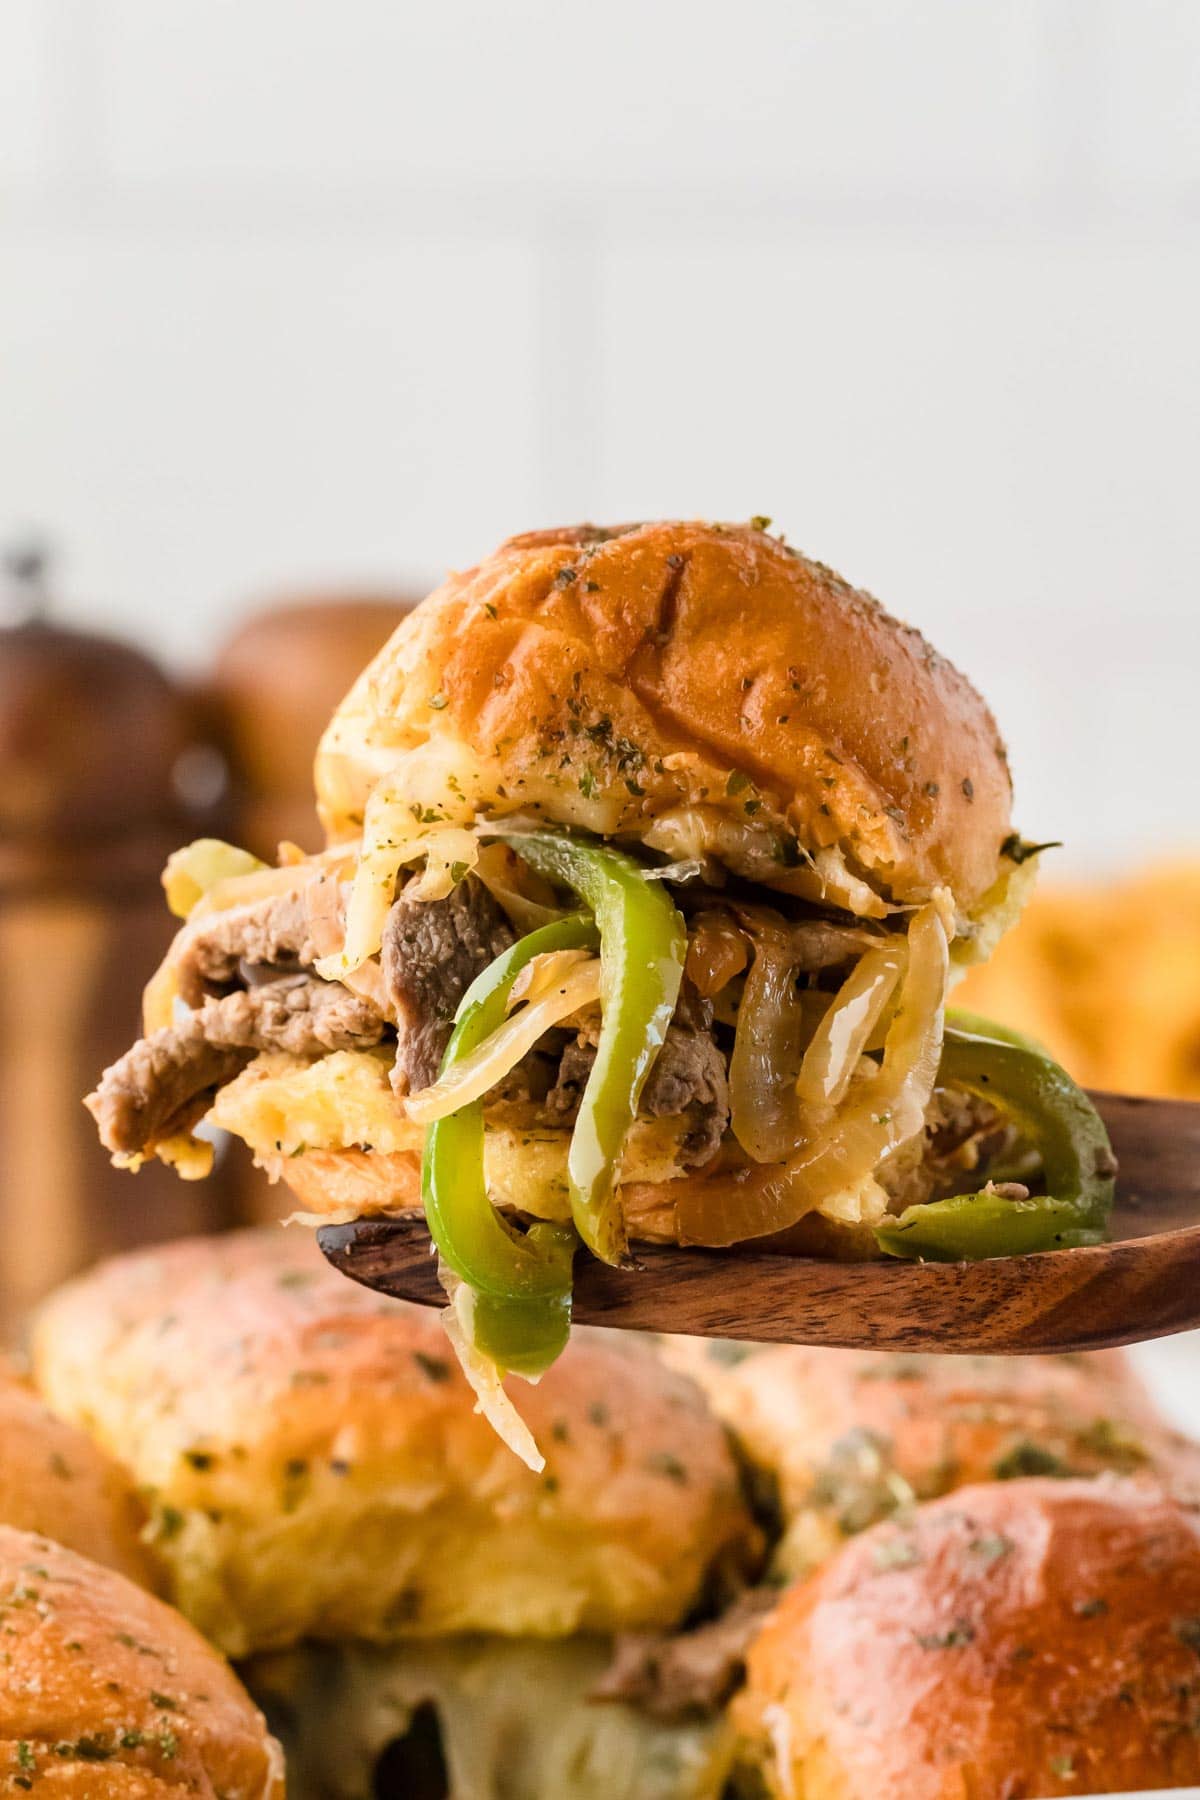
Storage
Storage: Store any leftover sliders in the refrigerator in an airtight container or resealable bag for up to 4 days.
To reheat, preheat oven to 300 degrees F and bake for 10-15 minutes, or until warmed through. You can also microwave for 30-60 seconds; this option may make the buns a bit soggy.
Can I make this ahead of time and freeze it?
Make Ahead Tips:
- Cook the steak and sauté the peppers and onions.
- Assemble the sliders as instructed without brushing the melted butter on the tops of the buns.
- Wrap the sliders in aluminum foil and place them in a freezer bag or freezer-safe container. Store in the freezer for up to 2-3 months.
- Thaw sliders in the refrigerator.
- Follow the instructions for the butter mixture and brush over the tops of the buns. Follow the same cooking directions as listed in the recipe.
How to Make Philly Cheesesteak for a Crowd
Have a large crowd to feed? Make a Double Batch of Party Sliders. You can easily double the ingredients and bake them on a large sheet pan instead of using a baking dish.
I will wrap my sliders in foil or parchment and place them in a slow cooker on warm to serve warm for a party
What to Serve with Philly Cheese Sliders
Philly Cheesesteak Sliders pair well with a variety of sides to complete your meal. Here are some delicious options:
- French Fries, Onion Rings, Sweet Potato Fries, or tator tots cooked in the air fryer are great, easy, and simple choices.
- Coleslaw: A tangy, crunchy coleslaw adds a refreshing contrast to the richness of the sliders.
- Garden Salad: A simple green salad with a light vinaigrette balances out the meal with some freshness and crunch. We love my 1905 Salad for any party!
- Macaroni and Cheese: Creamy mac and cheese is a comforting, crowd-pleasing side that pairs wonderfully with the savory sliders. A baked mac and cheese is always a hit too!
- Chips and Dip: For an easy and fun option, serve with a side of chips and your favorite dips, such as guacamole, salsa, or a creamy cheese dip.
Other Great Party Recipes
Hungry for more easy, home-cooked, delicious recipes?
Sign up for my free recipe club to get family-friendly recipes in your inbox each week! Find me sharing daily meal-time inspiration on Pinterest, Facebook, and Instagram.
Easy Philly Cheesesteak Sliders
Equipment
- large cast iron skillet (or any skillet)
- silicone brush (or pastry brush)
- casserole dish (or baking sheet)
Ingredients
- 1 ½ pounds ribeye steak, thinly sliced (or shaved)
- 2 tablespoons olive oil, (or butter)
- 2 tablespoons Worcestershire sauce
- 1 yellow onion, thinly sliced
- 1 green bell pepper, thinly sliced
- ½ teaspoon kosher salt, (or to taste)
- ½ teaspoon black pepper
- 8 slices provolone cheese
- 12 slider buns
- 4 tablespoons salted butter, melted
- 1 teaspoon garlic powder
- 1 teaspoon onion powder
- ½ tablespoon dried parsley
Instructions
- Preheat oven to 350℉ and lightly spray pan.
- Prepare bell pepper, onion, and steak by thinly slicing.
- Heat olive oil in a large skillet, over medium-high heat. Add the thinly sliced steak to the skillet. Season with ½ teaspoon salt, ¼ teaspoon pepper, and 2 tablespoons of Worcestershire sauce. Cook until browned and cooked through. Remove from the skillet and place in a bowl.
- To the same skillet, add the green bell pepper and onion. Season to taste with additional salt and pepper. Sauté until the onions and bell pepper become soft. Remove from heat.
- Slice the slider rolls in half horizontally while keeping the 12-pack of buns intact.
- Place the bottom halves of the slider buns on a greased baking sheet or dish.
- Layer the cooked steak evenly over the buns. Top the steak with onions and peppers. Add 8 slices of provolone cheese and top each slider with the top half of the bun.
- Melt 4 tablespoons of butter and mix in 1 teaspoon onion powder, 1 teaspoon garlic powder, and ½ tablespoons of parsley. Brush the butter mixture onto the tops of the slider buns and cover with foil.
- Bake for 10 minutes. Remove foil and bake for 10 more minutes, uncovered.
- Remove from oven and serve while warm.
Want to Save this Recipe?
By submitting this form, you consent to receive emails from Soulfully Made.
Notes
Nutrition Information
Nutritional Disclaimer
Soulfully Made is not a dietician or nutritionist, and any nutritional information shared is only an estimate. We recommend running the ingredients through an online nutritional calculator if you need to verify any information.
©️Soulfully Made


Easy recipe to follow, and very tasty results. We had NO leftovers
Thank you, Charlette! Best compliment when there are even leftovers! I appreciate your feedback and so glad this one was easy and delicious! That is my goal!